All After Affects plugins for Mac have been updated to support M1 Silicon compatibility. Enjoy!

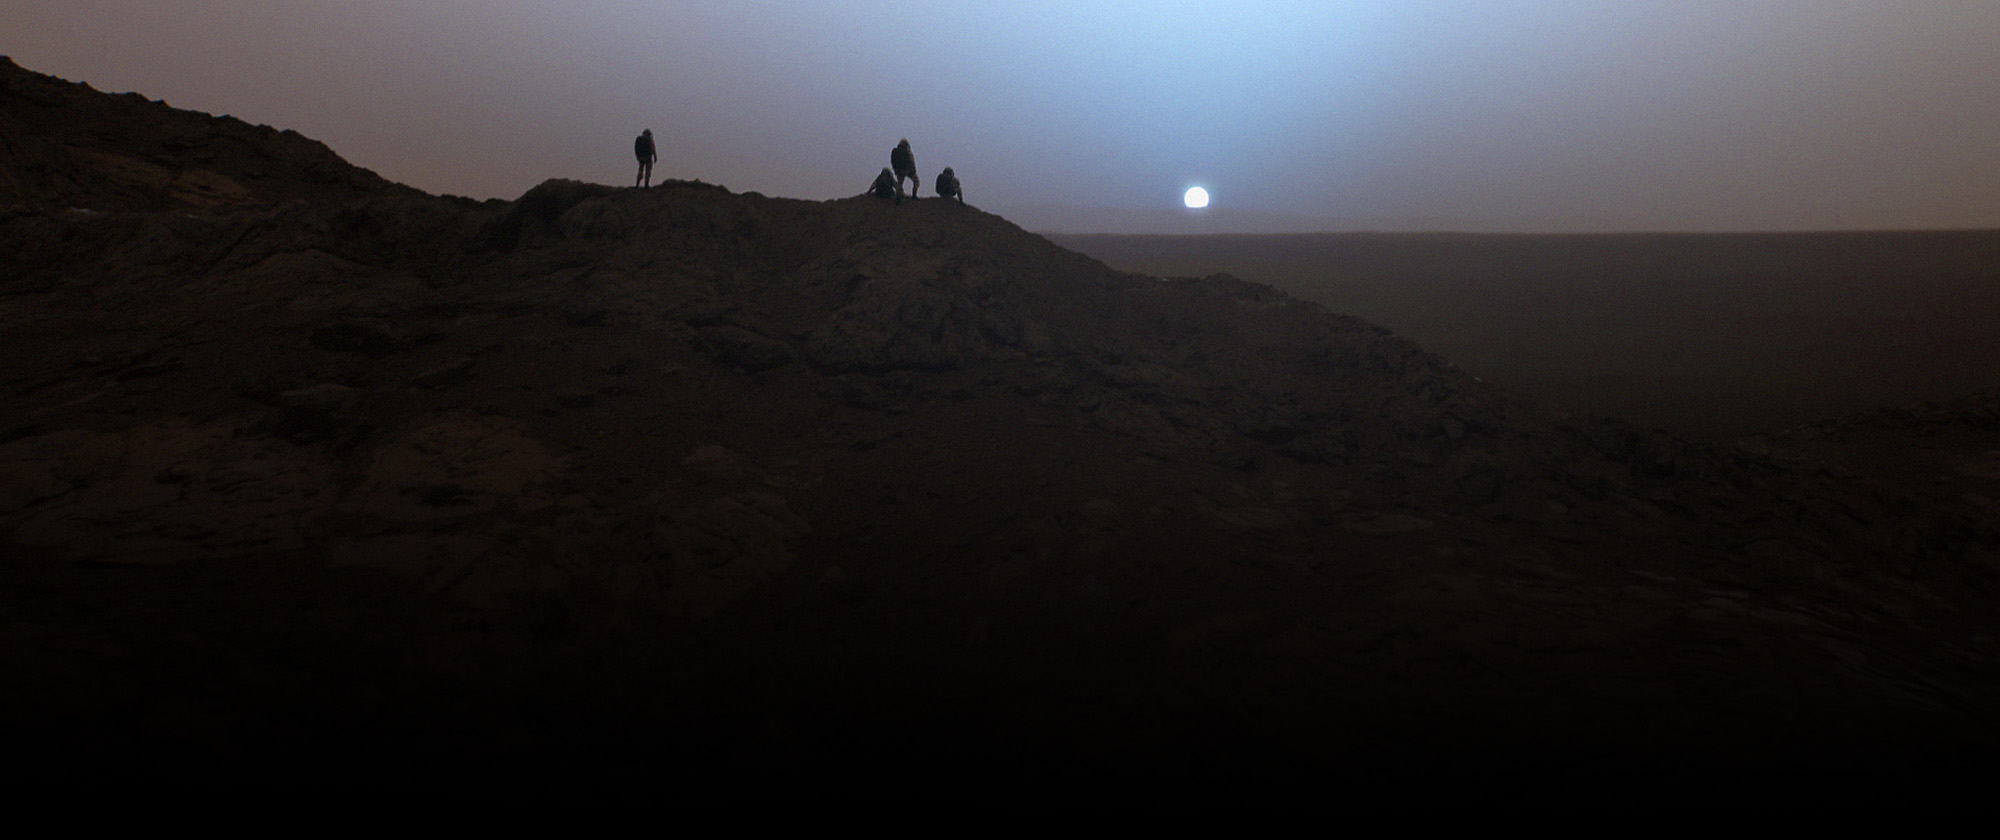
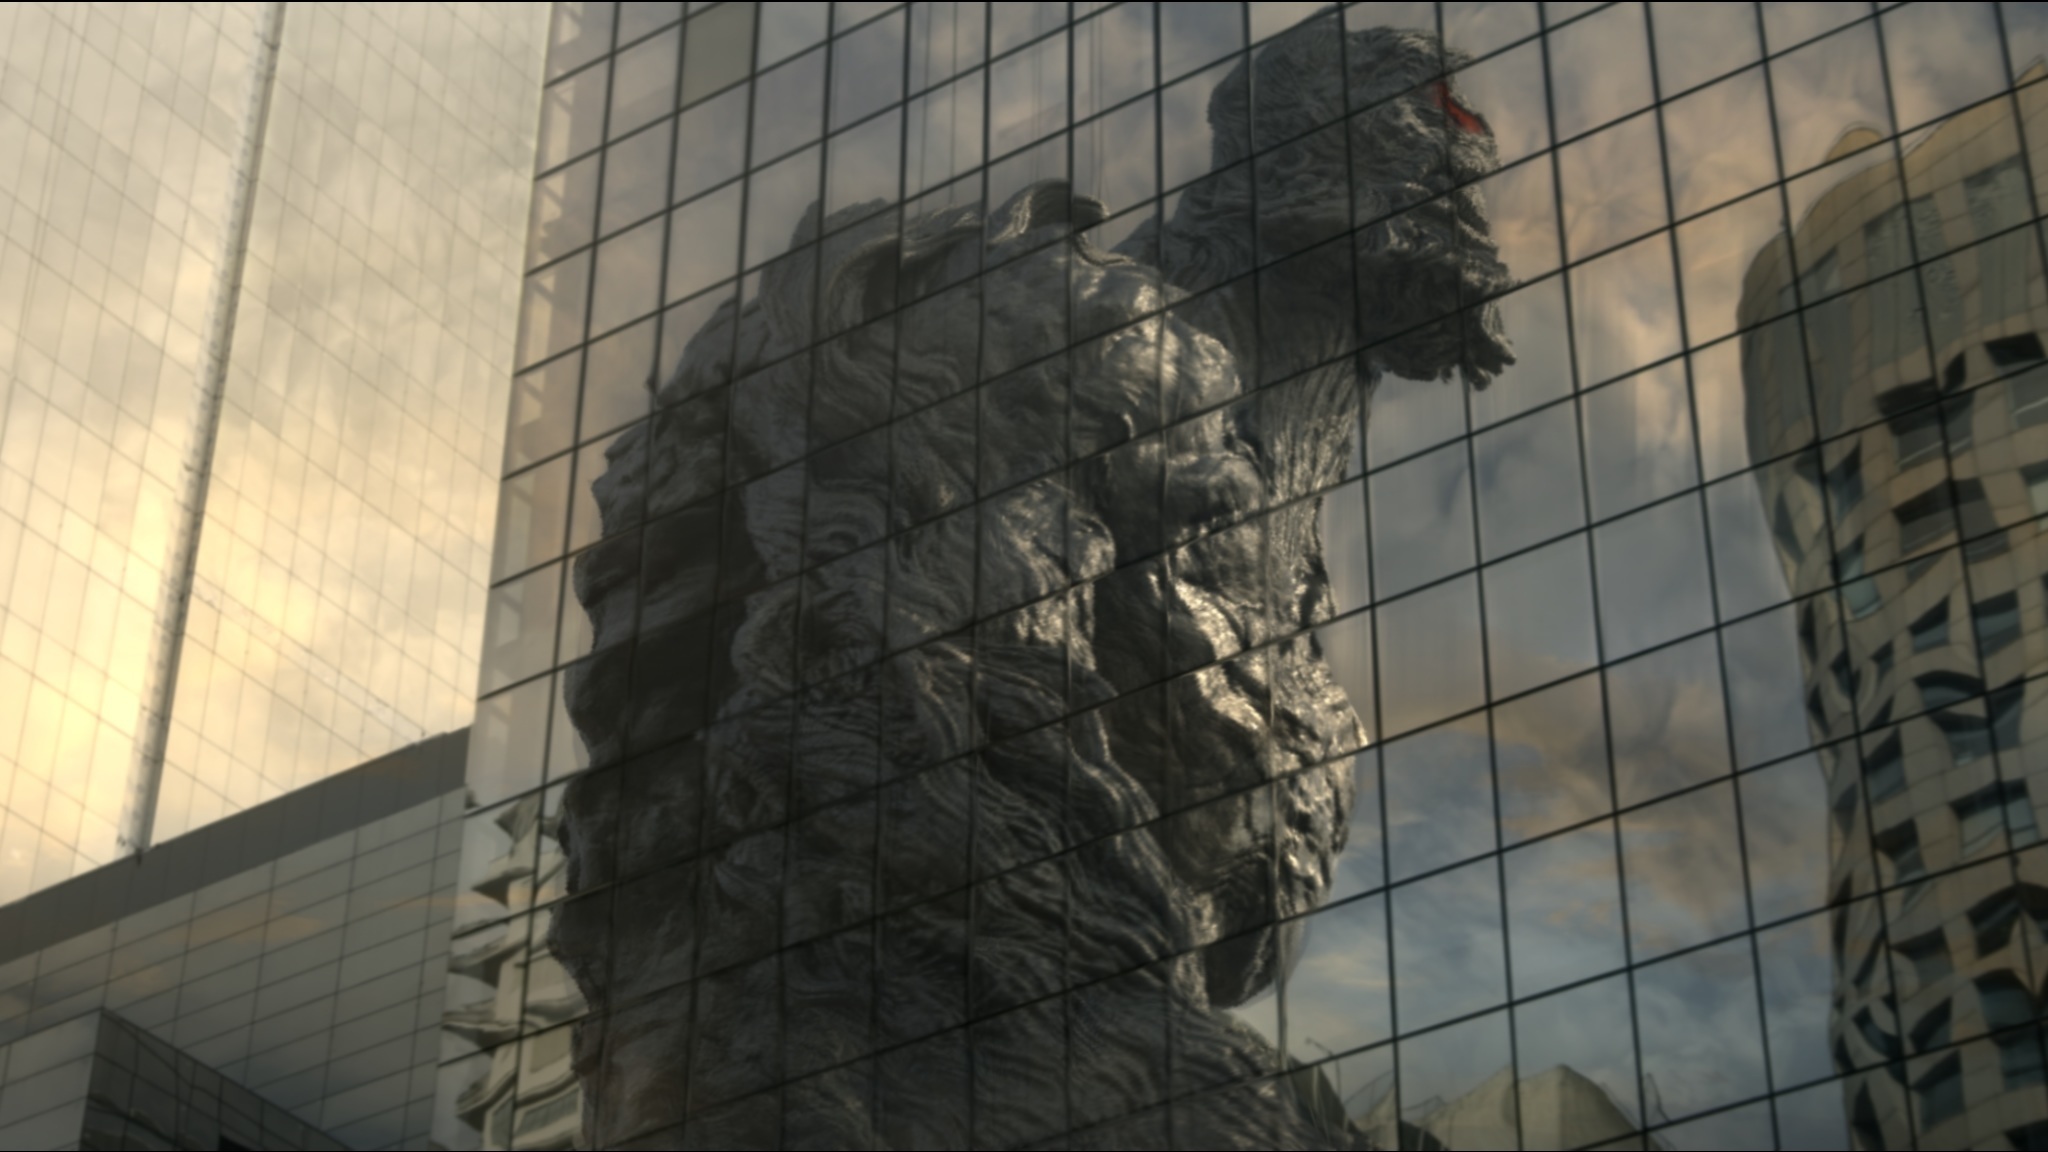
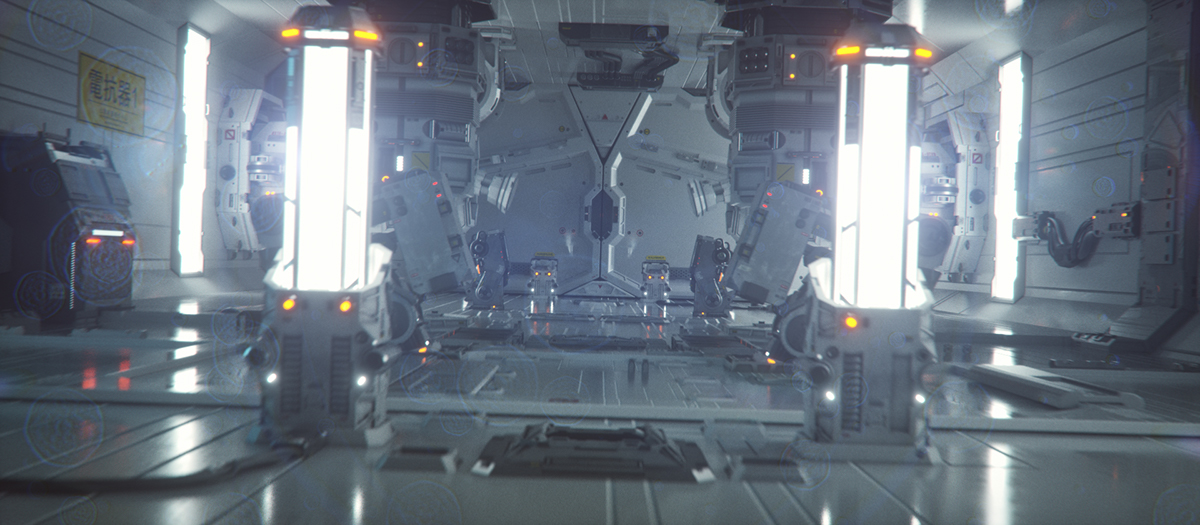
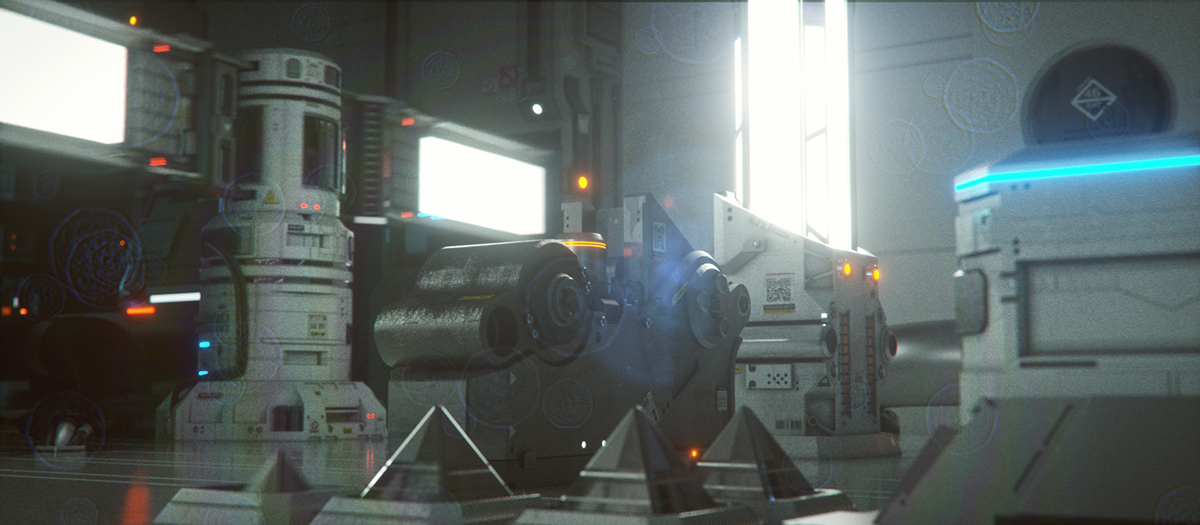
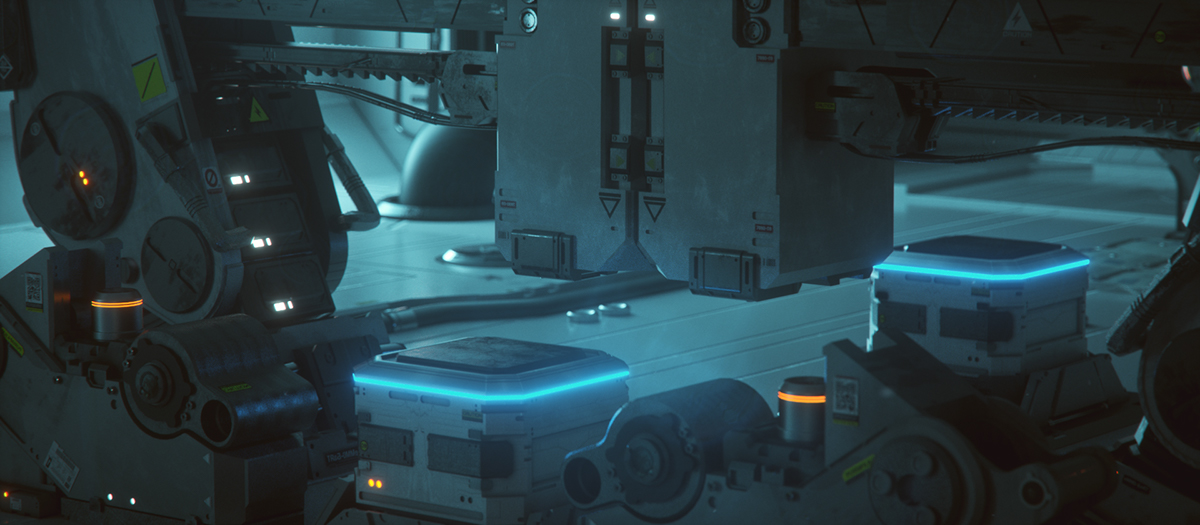
A breathtakingly-beautiful short CGI film developed by the uber-talented Aris Michailidis has just been released. The meticulous attention to detail, cinematic lighting and beautiful camera work is something to marvel at. Aris pointed out that many of the shots were developed using DOF PRO.
Check out the gorgeous short film here.


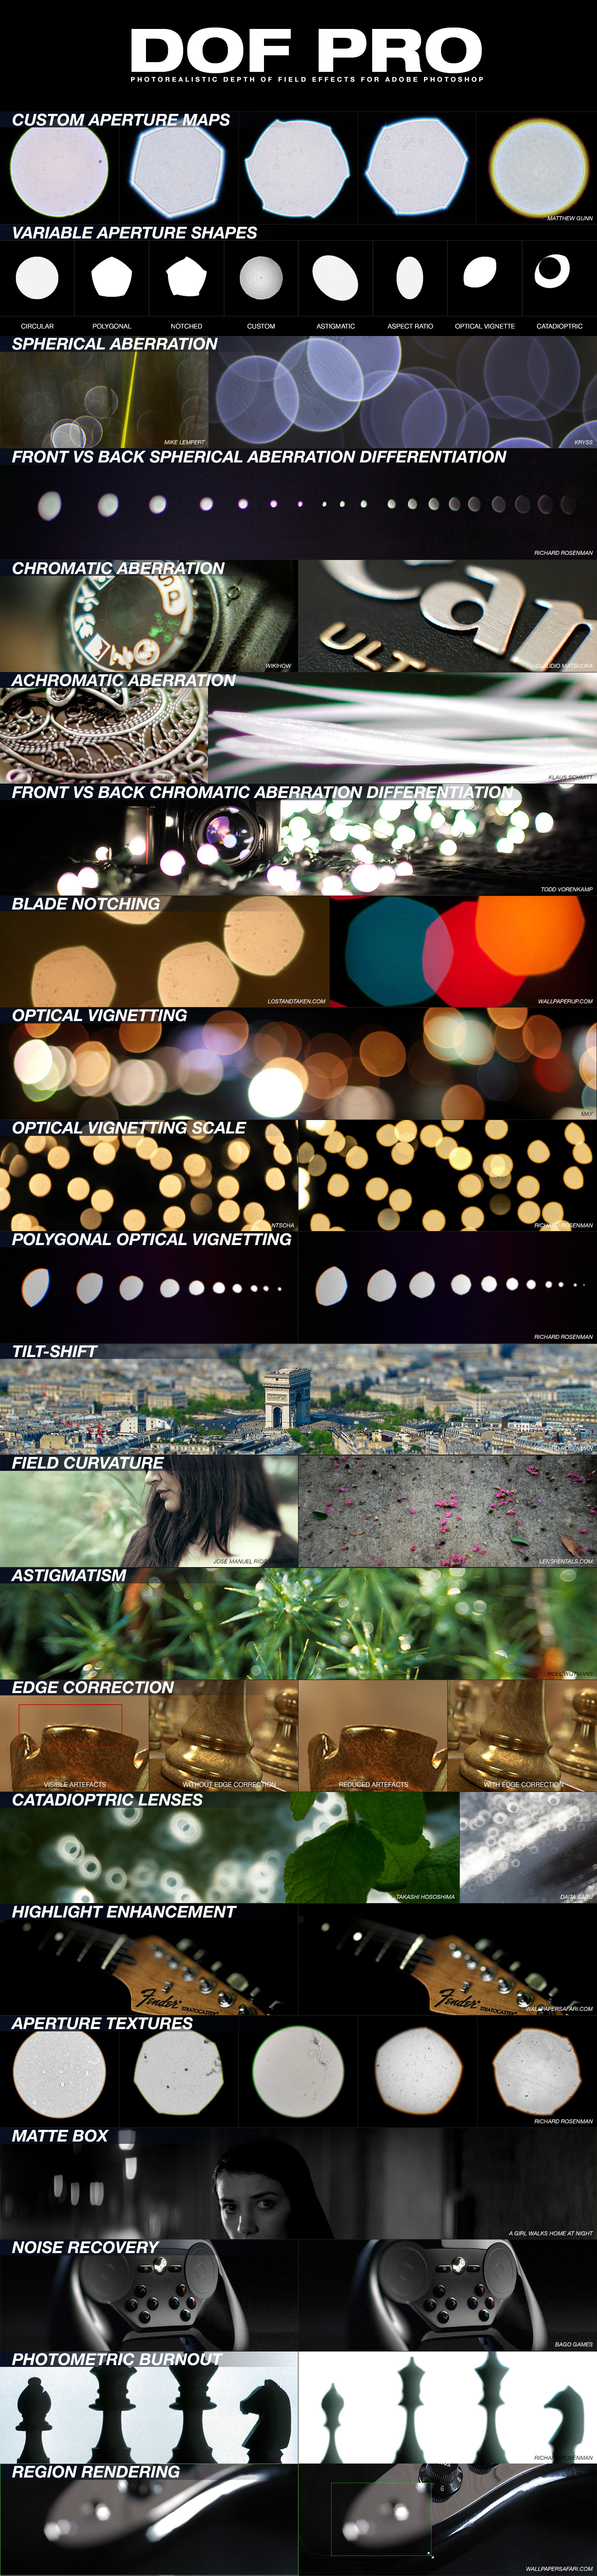
DOF PRO v5.2 has been released. This exciting update contains a number of important bug fixes as well as improvements. To see the updates, please review the Changelog located at the bottom of the documentation tab. You can check it out here!
The brand-spanking new Motion Mosaic plugin for Adobe After Effects has just been released! Motion Mosaic is a complex After Effects plugin that generates a motion mosaic using a displacement and icon layer. The ability to rotate, scale or offset the icon layer’s time by the displacement layer is what produces truly unique results. Check it out here!
Check out the brand new, ultra-powerful DOF PRO plugin for After Effects! DOF PRO is a powerful plugin for After Effects, capable of complex depth of field effects. This is a full port of the Photoshop version, complete with tons of additional new features and optimized for After Effects! You can check it out here.
The Ascii Art Photoshop plugin has been updated. Users stated that it produced a MEMORY ACCESS VIOLATION error when trying to save the ascii file. You can check it out here.
It took some time but all After Effects plugins are now Mac compatible. When downloading any demos from their respective pages, the archives will now contain both Mac and Windows versions.
Installation and Activation instructions have also been updated to show support for both platforms.
There is a brand new DOF PRO video tutorial that covers highlight processing. Take an in-depth look at how to correctly process highlights generated with DOF PRO using standard Photoshop tools.
The tutorial has also been posted in the product page under Tutorials and you can also find various other tutorials on my YouTube Channel located here.
The brand new Palette Mapper plugin for Adobe After Effects has officially been released. It’s 100% FREE – go check it out!
An update has been added to Particle Projection, bringing it to version 1.1. This includes some bug fixes as well as several new and exciting features. Check it out!.
You can check it out here!
I’m delighted to announce the immediate release of my first After Effects plugin, Particle Projection. Particle Projection is a powerful After Effects plugin for generating complex particle arrays projected through the use of a displacement layer. Particle Projection can create stunning and unique generative effects with an incredible level of detail.
Music from https://filmmusic.io:
“Crypto” by Kevin MacLeod (https://incompetech.com)
Licence: CC BY (http://creativecommons.org/licenses/by/4.0/)
I’m excited to release my latest plugin: Electra for Adobe Photoshop! Electra is a powerful Photoshop plugin for generating electric rays, lightning bolts, electrical charges, power currents and much more. Electra is fast, packs a rich feature-set and is fully-integrated within Adobe Photoshop.
Check out the free demo here!
The development of Photoshop plugins, as well as any type of computer graphics software, requires certain key aspects to be taken into consideration. This article will discuss some of them in detail based on my experience, and explain why they are important. While this article has been written with Photoshop plugins in mind, it is applicable to any type of software / interface design.
Interface Design
Putting the technology aside, good interface design is quite possibly the single most important feature of any software, especially in Photoshop plugin development. A poorly designed interface can make the most powerful software virtually unusable. Understanding how to properly design and layout an interface is crucial, especially when taking into account the workflow required.
As much as this is a no brainer, it needs to be repeated: effective software interfaces should be designed in a logical manner. A considerable amount of pre-planning is about as important here as storyboarding is to a film. More often than not, various interface mock-ups may need to be designed in order to see which one works best. Even long after controls have been dropped into an interface and the plugin developed near completion, the interface will continue to evolve until it has been organized to be in its most logical and effective layout possible.
It’s important to break down what your software will do so as to know how to design the optimal interface for it. For example, Lumiere is a powerful plugin for creating sophisticated glows for Adobe Photoshop. The plugin works by selecting a set of pixels above a brightness tolerance level, diffusing the pixels and compositing them back on top of the source image. It’s of no coincidence that the interface has been broken down into three control groups that provide specific tools for each of these steps: selection, diffusion and output.
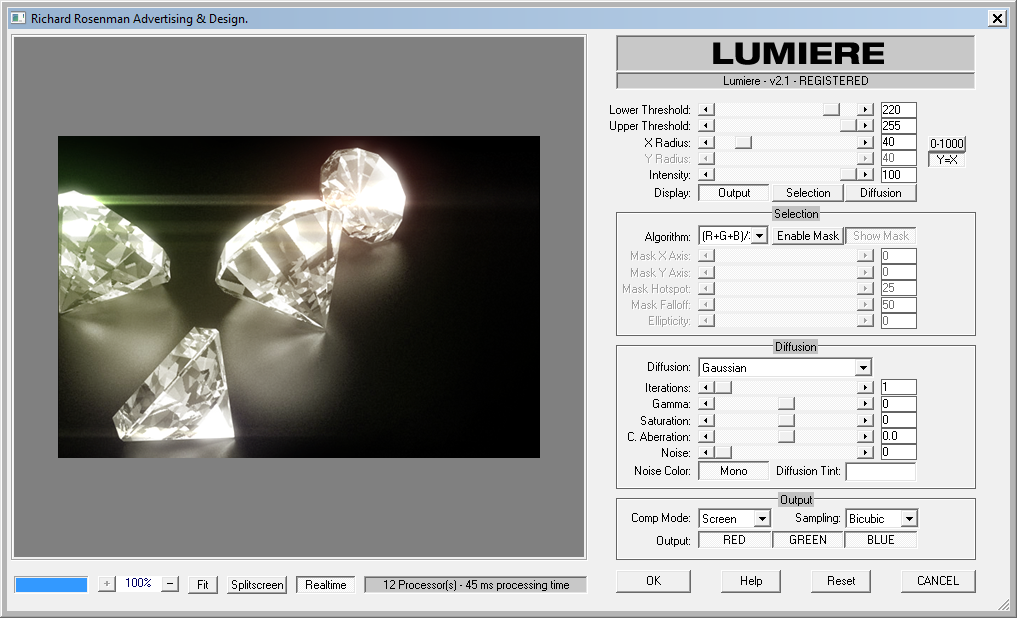
Each of these control groups focuses on features specific to that particular step. The control groups are bundled together within a group box and labeled accordingly. They are even presented in the order that the functions occur – first selection, then diffusion and finally output.
Since we’ve established that our control groups will handle local controllers for those specific functions, we’ll follow logic and place global controllers outside of control groups. What this does is establish to the user that local controllers affect specific functions whereas global controllers affect the entire effect as a whole.
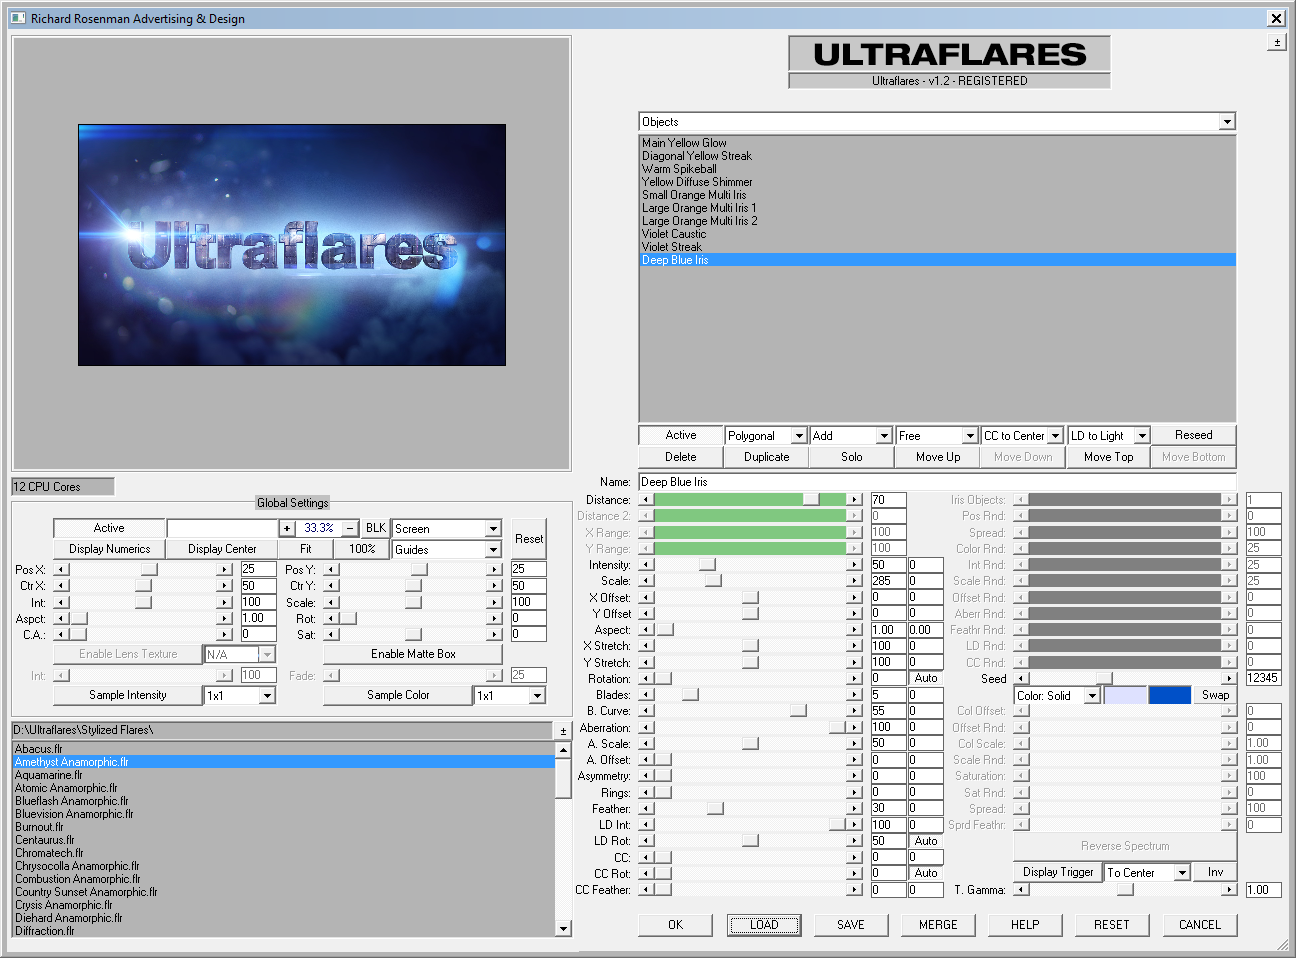
A good example of local vs global controllers is seen in the Ultraflares interface. The controls on the right side are specific to each flare object and will be disabled if no object has been added. A scale control will scale that particular object only. Conversely, the global controls on the left side, specifically labeled global parameters, affect the entire effect. A global scale controller in this section will scale all objects at once.
Establishing this kind of interface logic benefits both you and the user in the long run. The user will be able to effortlessly pick up your other software as they now understand the logic behind your interface design structure. For the developer, it establishes a defined workflow that ties all their software together, thereby providing consistency between products.
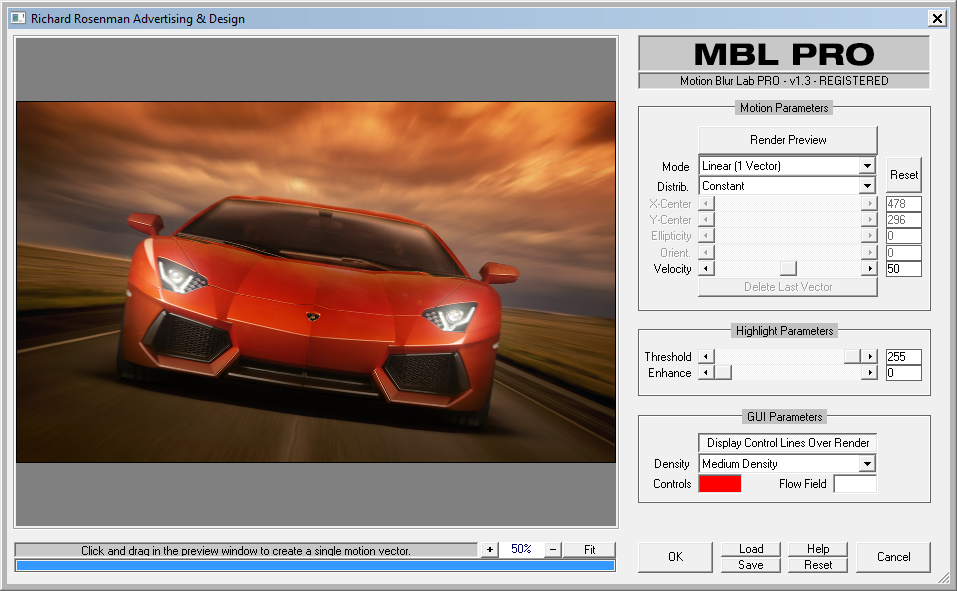
Just like the principles of design, controller sizing is another important technique in establishing controller importance. For example, it could be argued that possibly the most important controls found within a software are those that apply or cancel the effect. For this reason, these buttons should be larger than the rest and placed in a prominent area so that they are easily accessible and clearly visible. MBL PRO features a Render Preview that is accessed frequently to toggle a live preview on and off. It is the most often used control on the interface. As a result, it has been placed first where it is most easily accessible, most clearly seen and larger than most so as to establish its importance in the software’s usage.
Controller color coding is another way to group important or interdependent controls together. In Ultraflares, the multi-iris object unlocks a groups of 11 grey-colored controls. Similarly, the object distance controllers have been color-coded green to signify that they work together.
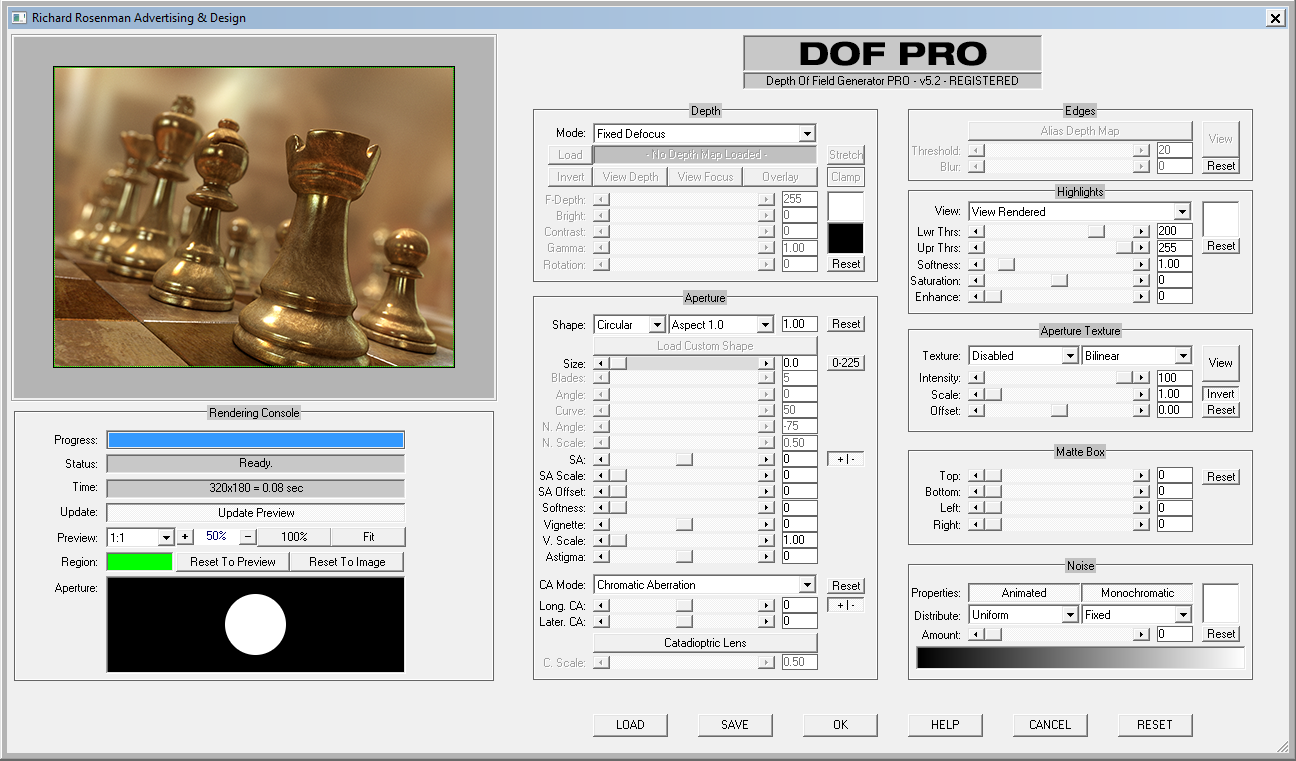
In DOF PRO, toggling the aperture size limit from 45 to 255 colors the controller red to suggest use with caution (shown here disabled). Enabling and disabling controllers also helps tremendously in effective interface design. A typical case is shown below in the depth control group where specifying an alternate depth mode will enable or disable select controllers. This helps educate the user as to which controllers work in tandem with any particular mode. You can see this is not the only control group that features enabled and disabled controllers.
Interface Space
Good interface design makes the most out of limited space. Screen ‘real estate’ is a commodity and, when developing interfaces, you’ll easily run out of space sooner or later. Plugins are even more challenging as they tend to use a smaller interface window overlaid on top of the existing host’s UI.
While it may be tempting to simply make the interface larger, you’ll run into user compatibility issues doing this. Every user works at different screen resolutions and aspect ratios. Dual monitor setups produce unique spanned desktop resolutions and aspect ratios not previously anticipated. Additionally, laptops have smaller screens and therefore lower resolutions. Even those with with high resolution displays typically have the font size adjusted to a larger than default value which also messes with the interface.
Keeping the interface as small as possible will ensure maximum compatibility with as many systems as possible. A resizable interface is the best compromise as the user can decide how large to set it according to their own limitations. Ultraflares features a huge interface and therefore uses several tricks to optimize the space as best as possible. For example, when enlarging the interface beyond a certain width, the global parameters will shift over and drop, allowing the preview window to enlarge. Additionally, the user is able to close the flare browser, also allowing the preview window to enlarge instead of wasting precious space.
Sometimes, it’s effective to display useful information pertaining to the plugin performance. Ultraflares displays the number of cores a system has, while Lattice goes much more in depth and displays object types, points, lines, effectors and even frames per second. This type of statistical information combined with performance details allows the user to understand how bottlenecks affect the software, and in turn, how to avoid them.

Resolution checking should always be performed. What if the user’s laptop screen resolution is set to 1024×600 but your software interface runs at 1280×720? The user would be unable to access some of the controls on the interface rendering it unusable. Even worse, the OK and CANCEL buttons usually located at the bottom of the screen could be inaccessible thereby providing no way to quit the application and requiring a forced shutdown.
Enlarged font size in Windows also enlarges the interface and sometimes pushes it beyond its limits. This is different because the interface may be adhering to the specified resolution limits but the enlarged text pushes it beyond that. This is tricky to check.
Interface Color
Interface color scheme is an often debated subject in the computer graphics industry. Many professionals, myself included, prefer a darker interface as it’s easier on the eyes and allows one to focus exclusively on the image intensity and colors without competing against the app interface. Many app developers made a conscious shift to a darker interface years ago for this reason, such as Adobe, Autodesk, The Foundry, etc.
However, programmatically changing interface colors is a somewhat complicated task. While changing background interface color can be done with one line of code, certain elements such as push buttons, drop down menus, list boxes, etc, cannot be changed from the default Windows color, or have limitations on what details can be modified. This restriction was most likely done on purpose so as to maintain consistency between apps on the Windows environment. The workaround to this is to create custom buttons using ownerdraw controllers and substitute standard dropdown menus with context menus for instance, once again, requiring a custom created context menu button of a darker color. Sometimes these buttons have to be designed programmatically line by line requiring more lines of code than for the actual plugin function! Alternately, some developers have opted to create bitmap buttons instead. This requires embedding bitmaps into the compiled file which results in larger file sizes. Additionally, text cannot be modified as it is baked into the bitmap. Finally, separate button bitmaps must be created for hover, active, and inactive states. While all of this is possible, it is certainly tedious and laborious work often not worth the complete redesign of an interface.
It’s easy to get carried away with branding. Developers have the ability, after all, to place a bitmap instead of a background color in the interface. But more often than not, the old KISS methodology stands true: Keep It Simple Stupid. Busily branded backgrounds more often than not clutter an interface and draw attention away from the important parts. Bright or saturated interface bitmaps are harder on the eyes and often make it difficult to easily see specific controllers that may become hidden or masked by the bright colors. This translates to a slower workflow for the user. The controls are, after all, the most important part of an interface so why minimize their significance via a flashy background that serves no functional purpose?
Themes
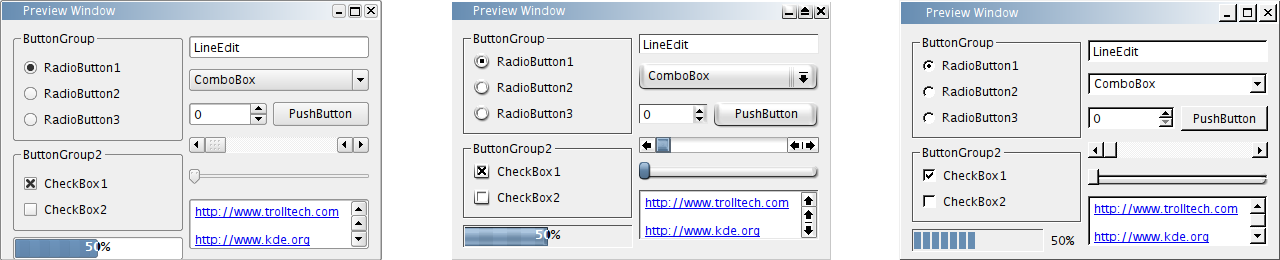
Windows themes can also affect the interface layout and design. There is a significant difference, for example, between the Windows XP standard theme and the Windows 7 Aero theme. Every interface element gets changed to a more modern look. Themes can be enabled or disabled in the development of the interface, as a whole or even on a per-controller basis. While a more recent theme may provide a more modern look and feel, it also produces incompatibility issues with older operating systems such as running an Aero-enabled theme plugin on a Windows XP system that does not have it. In this case, the user will experience a layout with an unpredictable look.
Below is an example of interfaces shown using various Windows themes.
The original uploader was Sikon at English Wikipedia. – Transferred from en.wikipedia to Commons by IngerAlHaosului using CommonsHelper., GPL, Link
Performance
Today’s workstations are fully multithreaded with more and more cores becoming available as CPU technology continues to improve. As a result, multithreading support is an extremely important aspect of plugin / software development. A single threaded plugin will only use approximately 25% of a single CPU core in Photoshop on a quad-core machine. A fully multithreaded plugin will use every physical and virtual CPU core to its full extent: 100% The difference in speed is substantial. It is even possible to provide the user with affinity control so as to select specific cores for rendering with. This can allow the user to disable the primary core which tends to make the system sluggish during heavy processing loads.

More recently, GPU processing has become very exciting. Unlike CPUs that have a maximum number of 12, 24 or 36 cores for example, GPUs have literally thousands of cores available. The GeForce GTX 1080 Ti, for example, has 3584 NVIDIA cores available. While it is impossible to compare the performance of CPU cores to GPU cores, the speed differences are astounding. 3D renders which make use of the GPU for rendering are sometimes hundreds, if not thousands, of times faster than their CPU counterparts, depending on the task.
If your SDK provides tools for offloading calculations onto the GPU, it is highly recommended.
64 bit vs 32 bit is another important consideration. 32 bit technology is over a decade old and it has the limitation of being unable to access more than 4GB of system RAM, per app. This is a critical limitation in computer graphics and image procession when we are dealing with millions of pixels that depend specifically on RAM resources.
There are many other performance considerations to factor in that are more code-related. Some of these include avoiding division whenever possible, pre-computing variables outside of nested loops and only iterating through visible pixels within the preview window as opposed to hidden pixels lying outside the visible range of the preview window.
Color Depth
Hobbyists using Photoshop, After Effects or any other graphics app will most likely never go near the color depth options. Any professional, on the other hand, understands that working in a high color depth will result in significantly greater latitude for image processing and color grading.
The standard 8 bits per channel color depth provides you with 255 shades of red, green and blue. A 16 bits per channel color depth provides you with 32767 (or 32768 in Photoshop’s case) shades of red, green and blue. While 8 bits per channel may seem like it’s enough, it yields 8x8x8=24, 2^24=16,777,216 colors which results in some banding in subtle gradients. 16 bits per channel yields 16x16x16=48, 2^48=281.5 trillion colors. The industry standard color depth for 3D graphics is even higher – it is 32 bits per channel, also known as floating point. While Photoshop supports 32 bits per channel, only certain filters and functions are supported in this color depth.

One has to work with 32 bits per channel to truly understand how powerful it is. 3D renders that are completely overexposed in some areas can be fully restored to a legal white complete with their appropriate shading using 32 bits per channel color depth correction tools. With any other color depth, reducing an overexposed white will result in flat grey because the original color information beyond 255 or 32767 has been clipped and lost.
Jumping back to our discussion at hand, it’s important to provide at least 8 and 16 bits per channel color depth for any software intended for professional use. The function of the plugin, of course, will also dictate whether this is necessary or not. For example, software that produces a solid color shape will not benefit from any color depth greater than 8 bits per channel. As a matter of fact, an even lower color depth would suffice in this case. Likewise, software that produces a posterize effect (crushes an image’s color palette to a specified number of limited colours such as 4), will also not benefit from any color depth greater than 8 bits per channel. Conversely, software such as Ultraflares or Lumiere that produces fully shaded, intricately-coloured and variably-transparent effects will most definitely benefit from a higher color depth such as 16 bits per channel.
The Long Shadow plugin is an excellent example of this. It supports a feature where the shadow can be faded over distance. In 8 bits per channel mode, there are only 256 levels of transparency, while in 16 bits per channel mode there are 32767 thereby producing a much smoother fade.
An even more important factor to consider with color depth is when an image is of a particular color depth – let’s say 16 bits per channel, and the plugin supported color depth is of another – let’s say 8 bits per channel. In this case, either the plugin would have to be modified to support 16 bits per channel or the image would have to be converted to 8 bits per channel, thereby destroying all 16 bits per channel color information. There is no going back from this. A useful analogy would be like down-scaling an image and then trying to scale it back up to its original size once it’s been saved. Once an image has been down-sampled, the information is forever lost and it cannot be recovered. Scaling it back up will result in a blurry image. The same applies to down-sampling color depth.
What this means is that any knowledgeable professional will not sacrifice their image’s color depth so as to be able to use a plugin. In cases such as these, it will result in lost sales so it’s important to seriously consider the labor required in supporting multiple color depths.
There are basically two ways to programmatically handle multiple color depths.
One is to develop multiple functions for each color depth. This is sloppy and requires the duplication of code for each color depth resulting in far more code than is necessary.
The other is to handle all internal code as floating point, from 0.0-1.0 and scale to the appropriate color depth on output. This requires having only one master code that is flexible and can be easily scaled not just to 8 or 16 bits per channel, but also to any other color depth in the future.
Conclusion
There are many other considerations to factor into software development but we’ve covered some of the more important ones. As with design, these are guidelines, not rules. Ultimately, it’s up to you how you want to design your interface but in the end it should be logical and easy to use for all users. A well designed interface makes any software a pleasure to use.
The Halftone plugin has been updated to v2.0 with a ton of new features.
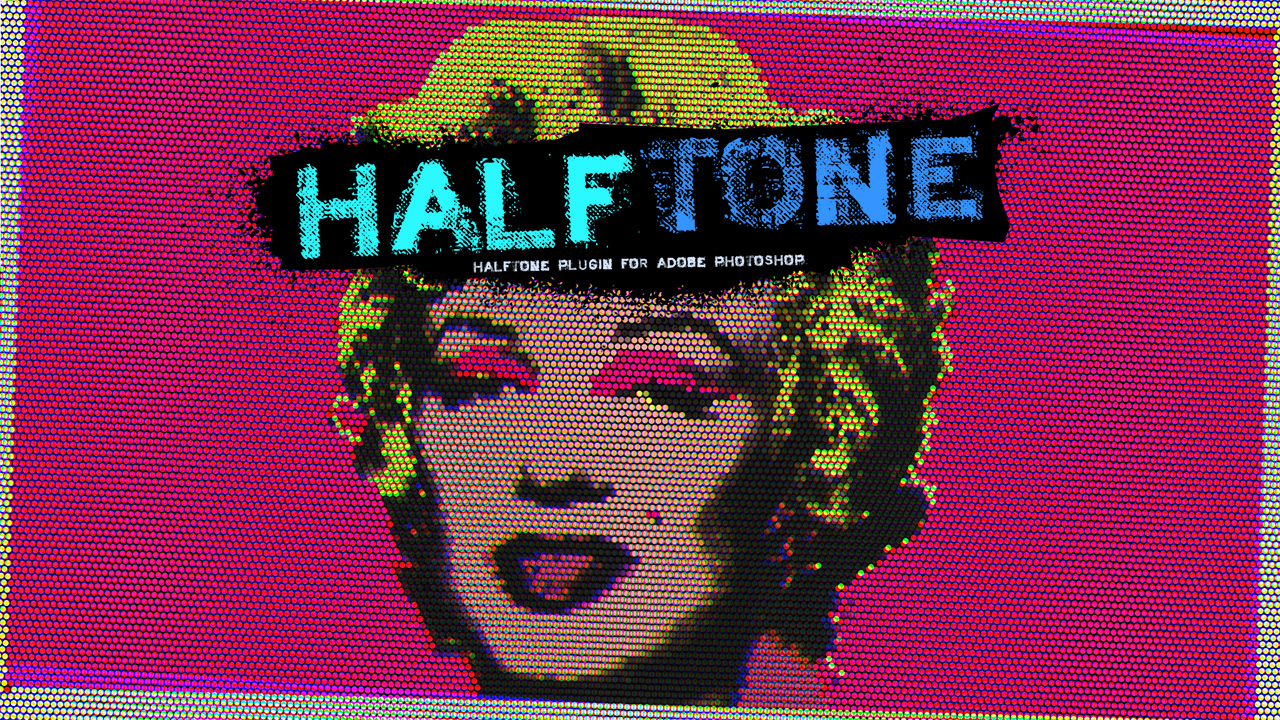
You can check it out here!
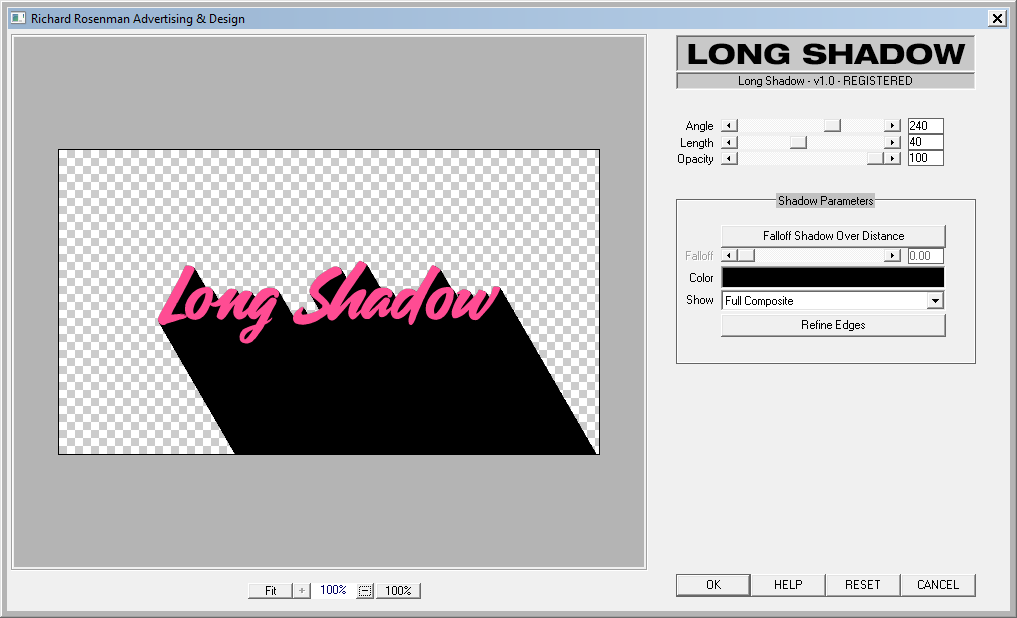
The brand new plugin Long Shadow, for the generation of flat, graphic shadows easily within Adobe Photoshop, has just been released!

Long Shadow features a minimalist interface with powerful tools for creating all types of graphic shadows. Check it out here.
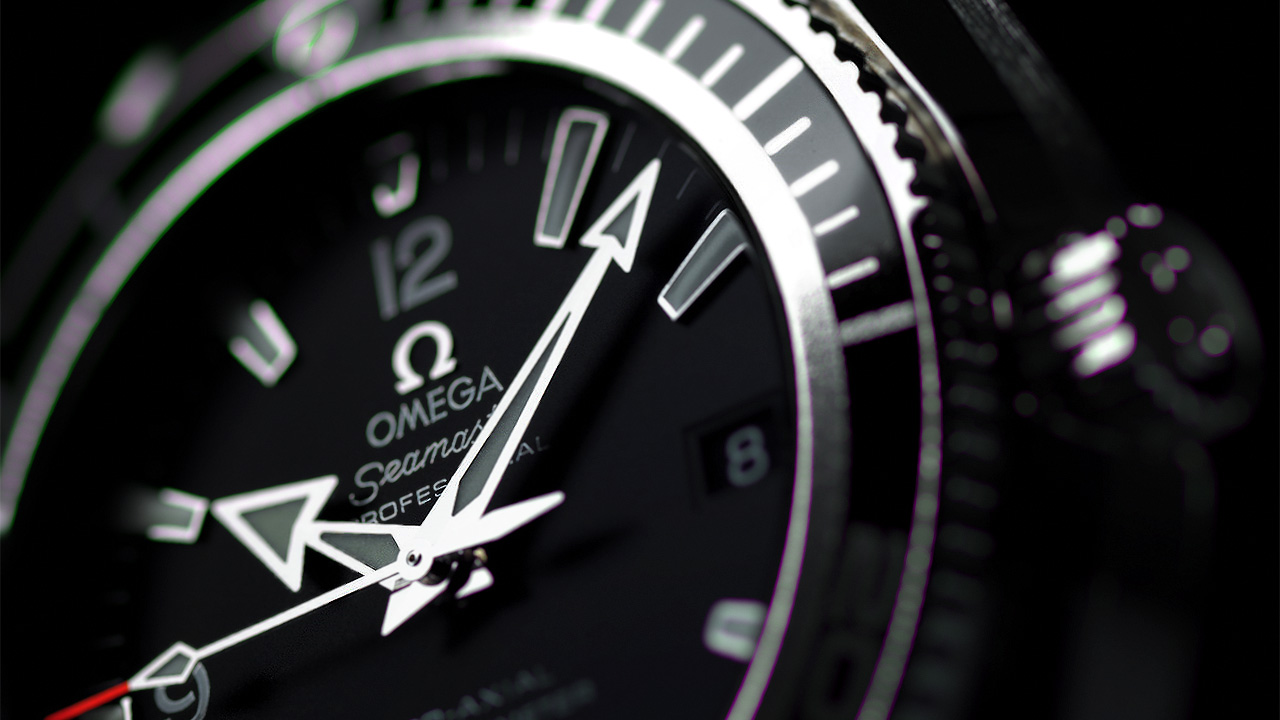
A quick but excellent of example of using DOF PRO for adding depth to this beautiful watch image, originally without depth of field. This is using DOF PRO’s chromatic aberration features and the built-in linear depth map function so a computer generated depth map wasn’t required. A pentagonal iris shape was used and highlights were brightened to produce vivid, sharp bokeh, all using DOF PRO’s built-in tools.

Check out DOF PRO now and download the free demo!
Ultraflares is much more than a lens flare plugin; it’s a full feature light studio. Its elaborate feature set provides an endless number of applications.
One interesting use for Ultraflares is in the creation of bokeh backgrounds. These backgrounds provide a subtle and minimalist out of focus backdrop from which your subjects can stand out from. Ultraflares can generate bokeh backgrounds using the powerful multi-iris object. Any number of options can be tweaked to deliver the exact result you’re after. You can even produce bokeh backgrounds using optical vignetting (Cat’s Eye Bokeh). In the example below, a bokeh layer was generated in HD with Ultraflares. The output took less than 1 second:
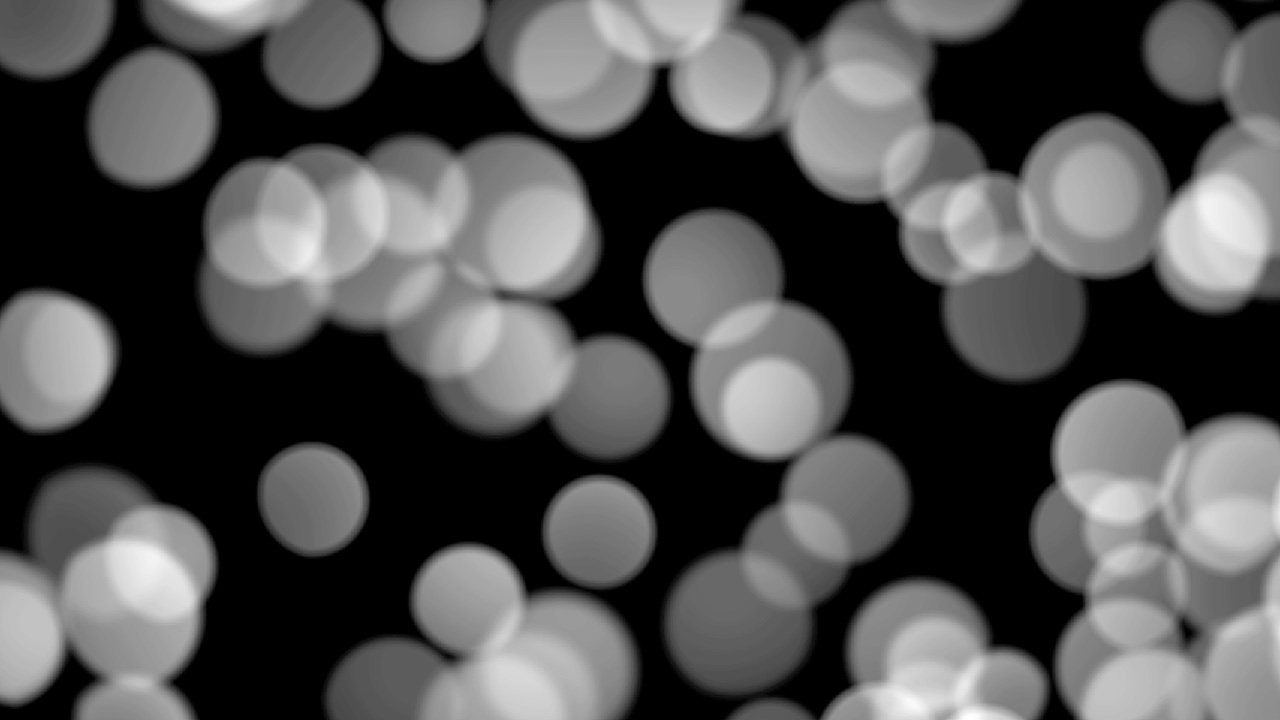
The bokeh layer can then be easily integrated into your own images. In this case, it was composited with this portrait and then color corrected:

If you haven’t already, check out Ultraflares and feel free to test drive the demo!
I’m pleased to announce the immediate availability of Ultraflares Flarepack Vol. 3, a collection of 30 cutting-edge lens flare presets for Ultraflares.

This collection focuses specifically on technology lens flares, providing detailed and sophisticated flare presets for all your modern hi-tech imagery.
I’m pleased to announce the immediate availability of Ultraflares Flarepack Vol. 2, a collection of 30 cutting-edge lens flare presets for Ultraflares.
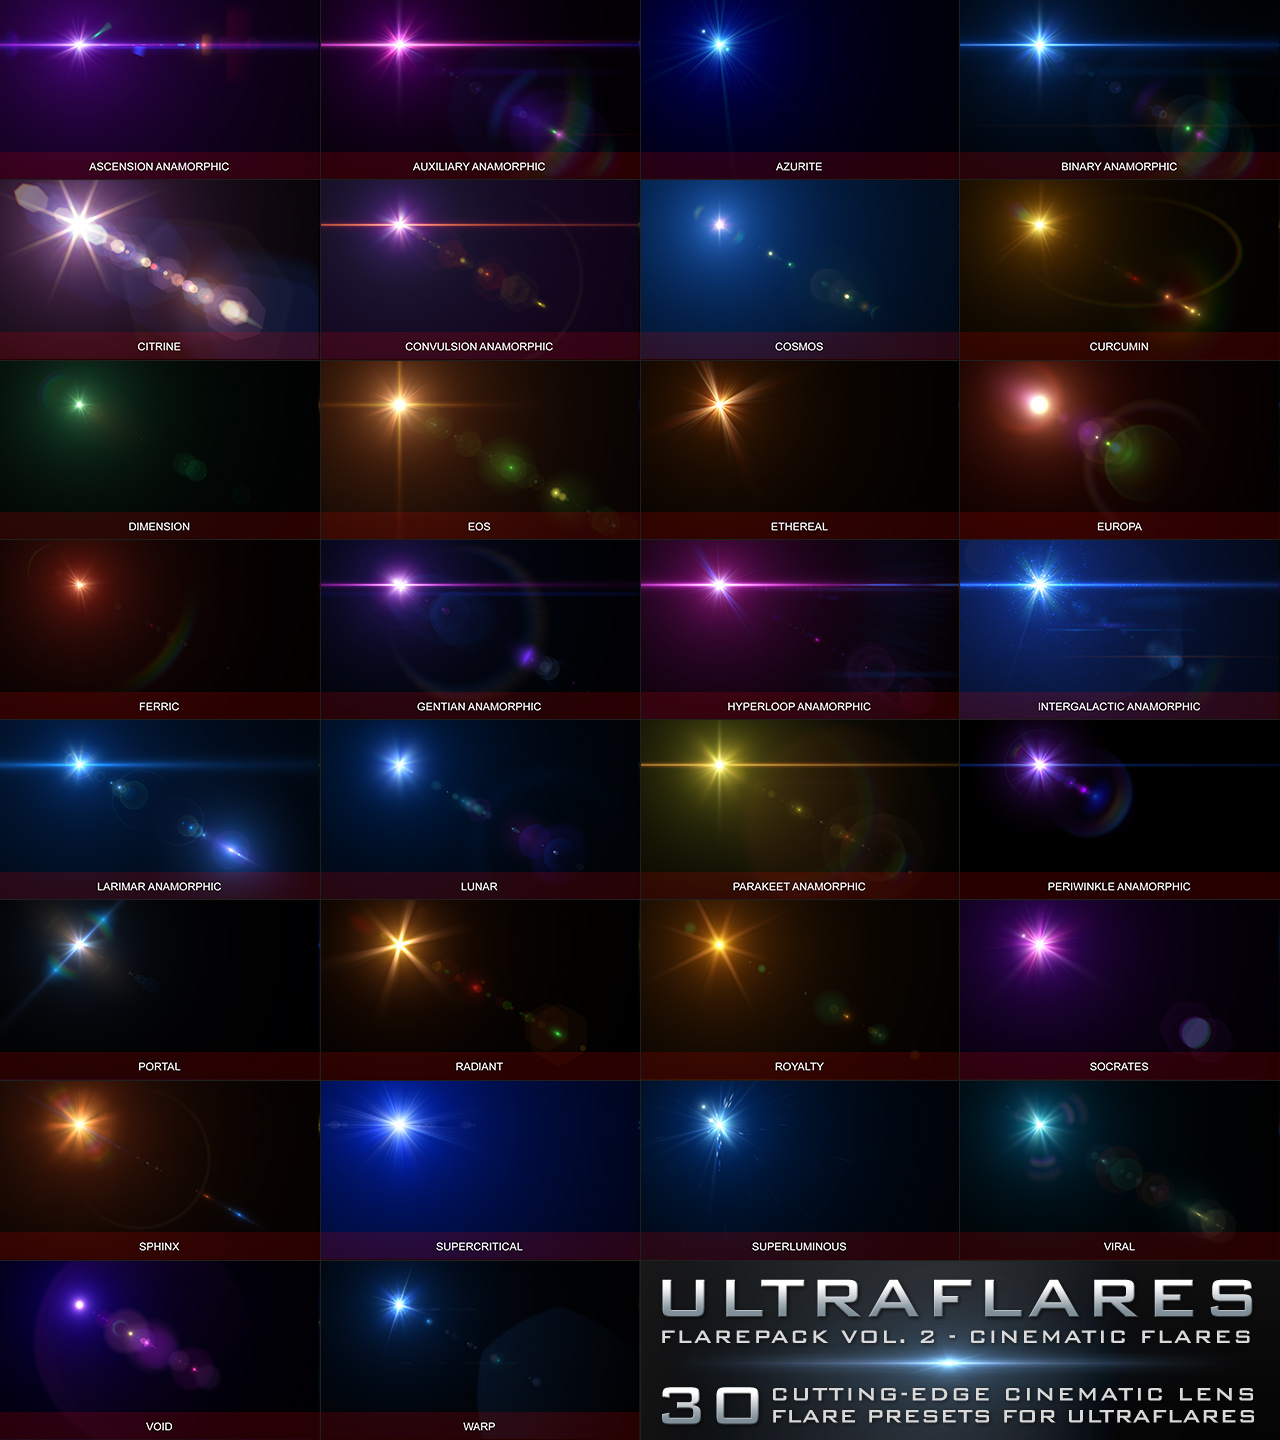
This collection focuses specifically on cinematic lens flares, providing detailed and sophisticated flare presets for all your modern photography and design.
There is a brand new Ultraflares video tutorial that covers how to work non-destructively with Ultraflares. This workflow applies to many other facets of Photoshop, in addition to Ultraflares so it is an invaluable tutorial:
The tutorial has also been posted in the product page under Tutorials and you can also find various other tutorials on my YouTube Channel located here.
There is a brand new Ultraflares video tutorial that covers using lens textures in great detail. If you’ve ever wanted to know how to use this killer Ultraflares feature, this is for you:
The tutorial has also been posted in the product page under Tutorials and you can also find various other tutorials on my YouTube Channel located here.
I’m pleased to announce the immediate availability of Ultraflares Flarepack Vol. 1, a collection of 30 cutting-edge lens flare presets for Ultraflares.

This collection focuses specifically on anamorphic lens flares, providing sleek and sophisticated flare presets for all your modern photography and design.
I came across an absolutely stunning photo of a snowflake featuring very prominent achromatic aberration, which tends to happen in macro shots due to lens imperfections. This photo was shot by Egor Kamelev and his work is quite beautiful.

Achromatic aberration is a key feature of the new DOF PRO v5.0 and it is capable of achieving this effect with breathtaking accuracy. If you haven’t already checked out DOF PRO, I encourage you to do so and check out the gallery for some incredible user examples.
As stated on Egor’s page, this photo was taken with an ILCE-7RM2 01/22 2018 The picture taken with 65.0mm, f/8.0s, 1/200s, ISO 100.
There is a brand new Ultraflares video tutorial that covers the plugin in great detail. If you are considering purchasing this plugin, or have purchased it but still wish to know how it works better than you currently do, this is for you:
The tutorial has also been posted in the product page under Tutorials and you can also find various other tutorials on my YouTube Channel located here.
A new update has been released for Ultraflares, making it version 1.2. This update focuses on various interface improvements such as maximize and minimize interface & browser, resize interface, and more. To see the full list of changes, please review the changelog in the documentation section on the product page.
Grab the new version of Ultraflares now located here.
I’ve just released the Image Light Leaks Vol. 3 – a huge follow-up collection of 162 4K professional image light leaks for digital artists, designers, photographers and retouchers! Check it out here!
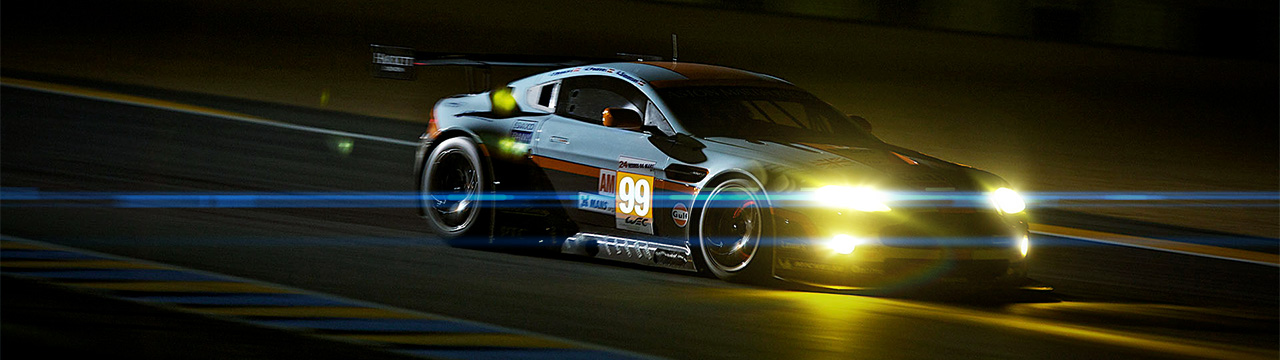
A cutting-edge DOF PRO render adding clean, crisp depth of field to the engine in this gorgeous photo. This process features some of DOF PRO’s intricate features including achromatic aberration and optical vignetting. The processing integrity is what makes this image: take note of how clean and razor sharp the depth of field effect is, providing brightly illuminated bokeh along the brilliant highlights.

Credit: Pixabay.com
For more info, check out DOF PRO now.
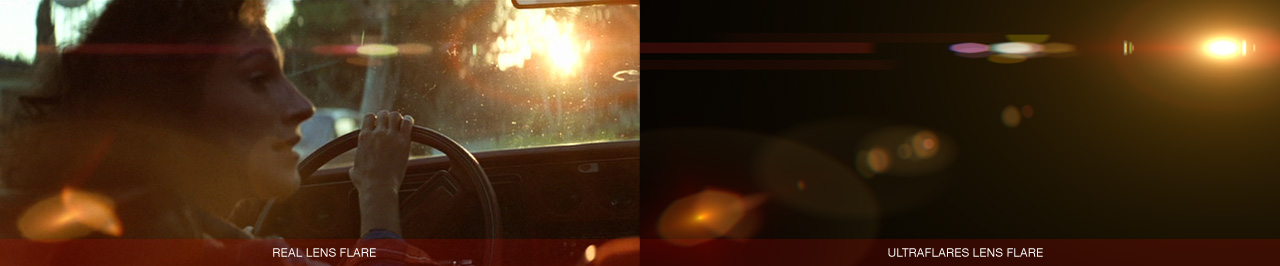
A quick process with DOF PRO to add focus through the use of depth of field to the steering wheel in this gorgeous photo. This process features some of DOF PRO’s awesome features including achromatic aberration and optical vignetting.

For more info, check out DOF PRO now.
Seeking an uber-talented Adobe After Effects developer for an exciting new plugin development project. If you think you’ve got what it takes and are interested in collaborating on cutting edge cool & creative software get in touch!
A new image created with 3ds Max, then DOF PRO for post depth of field using a computer generated depth map. Glints added with Ultraflares!
A quick test using Element 3D and it’s ability to export depth maps. It was then brought into DOF PRO and processed for cutting-edge depth of field.

In addition, the motion blur was created with MBL PRO, the glows were created with Lumiere, the post-processing with Image Light Leaks Vol. 1, and the lens flare with Ultraflares Photoshop plugins!
The latest Photoshop plugin is here!
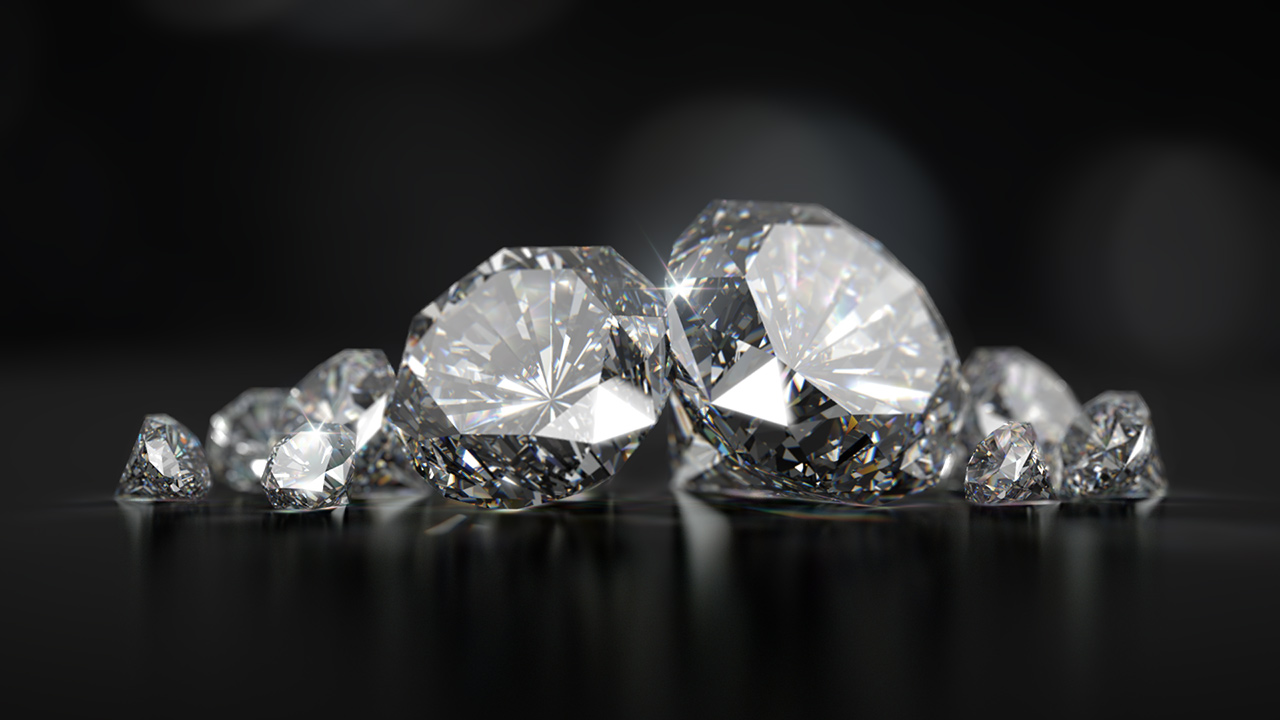
I’m pleased to announce the immediate availability of DOF PRO v5.0 (Depth of Field Generator PRO), the undisputed leader in photorealistic depth of field effects for Adobe Photoshop and compatible hosts.
DOF PRO v5.0 has had its core functionality greatly expanded and now includes some absolutely killer technology not previously available in any other depth of field processor. Check out the image below for a quick synopsis or better yet – check out the brand new DOF PRO v5.0 product page for a detailed breakdown of these new and exciting features!
DOF PRO has had over 12 years of industry-proven performance under its belt since its first release in 2005. Version 5.0 has seen a full year of extensive research and development in order to produce the most sophisticated depth of field processor in the industry. Every subtlety in the world of optics has been carefully studied and many implemented, marking this release the biggest in its history.
In addition to the massive list of exciting new features, DOF PRO v5.0 now also supports 16 bits / channel high color and is fully 64 bit enabled.
Check out the DOF PRO product page now and learn what makes DOF PRO v5.0 the first choice for photorealistic depth of field effects for Adobe Photoshop and compatible hosts.

It’s been over a year since the release of Ultraflares, the ultimate lens flare and light studio solution for Adobe Photoshop, and thanks to you, it continues to grow in popularity! Ultraflares has become a best seller and it’s no surprise why: it’s the definitive Photoshop plugin for those demanding the very best in photorealistic lens flares. If you haven’t yet checked it out, do so now and see what you can do with this killer plugin!
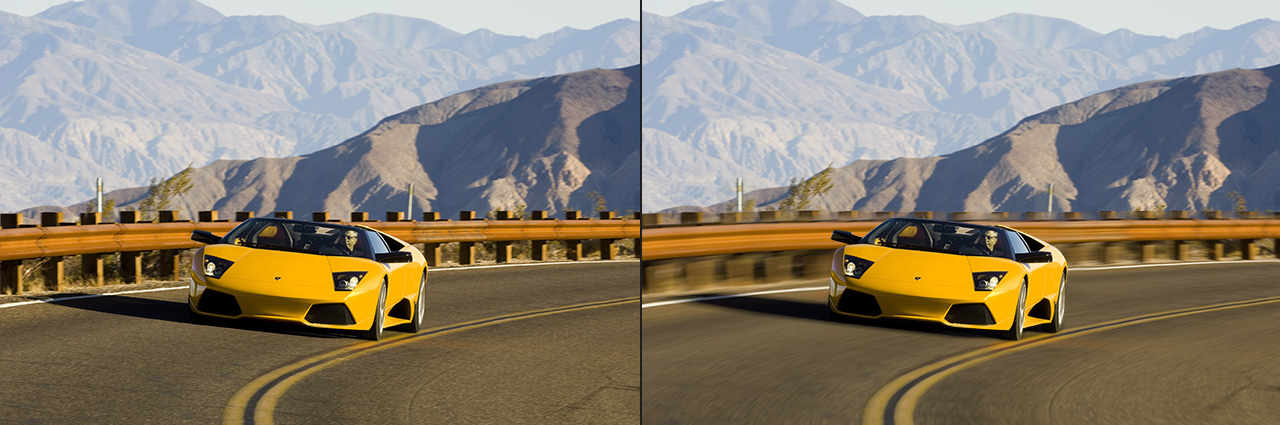
MBL PRO, the Photoshop plugin for the creation of sophisticated motion blur effects, has been updated to v1.3 fixing a bug that resulting in freezing with high resolution images.
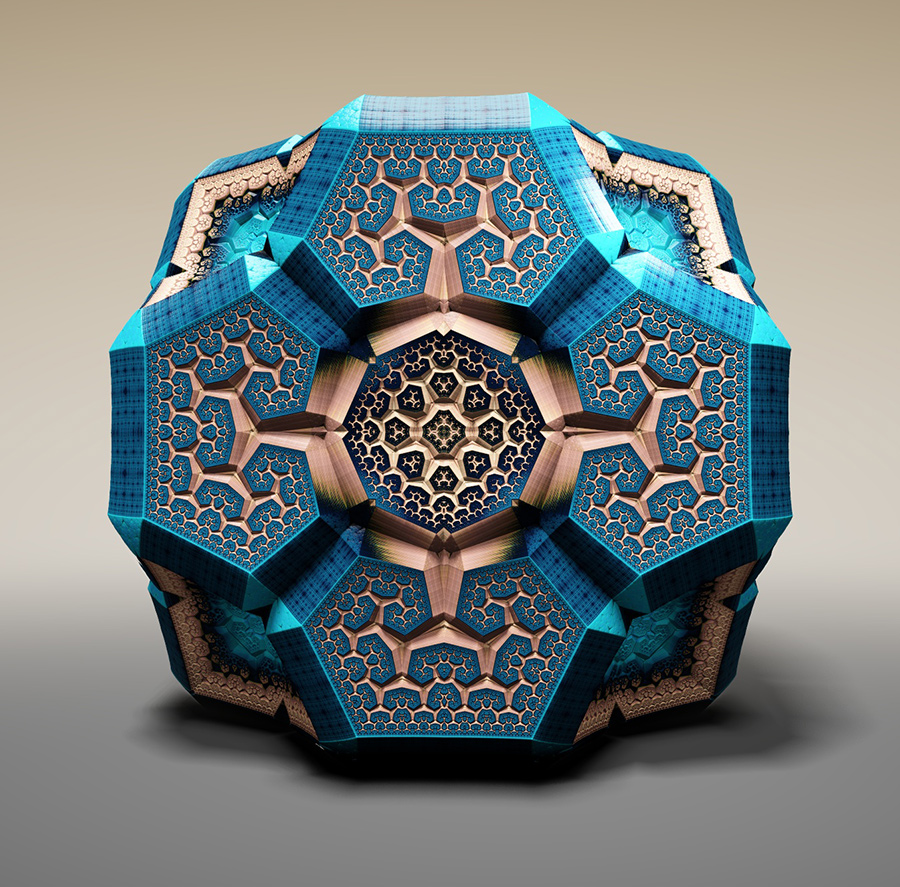
Another absolutely killer generative design find by Christoph Bader & Dominik Kolb, over at deskriptiv.de.
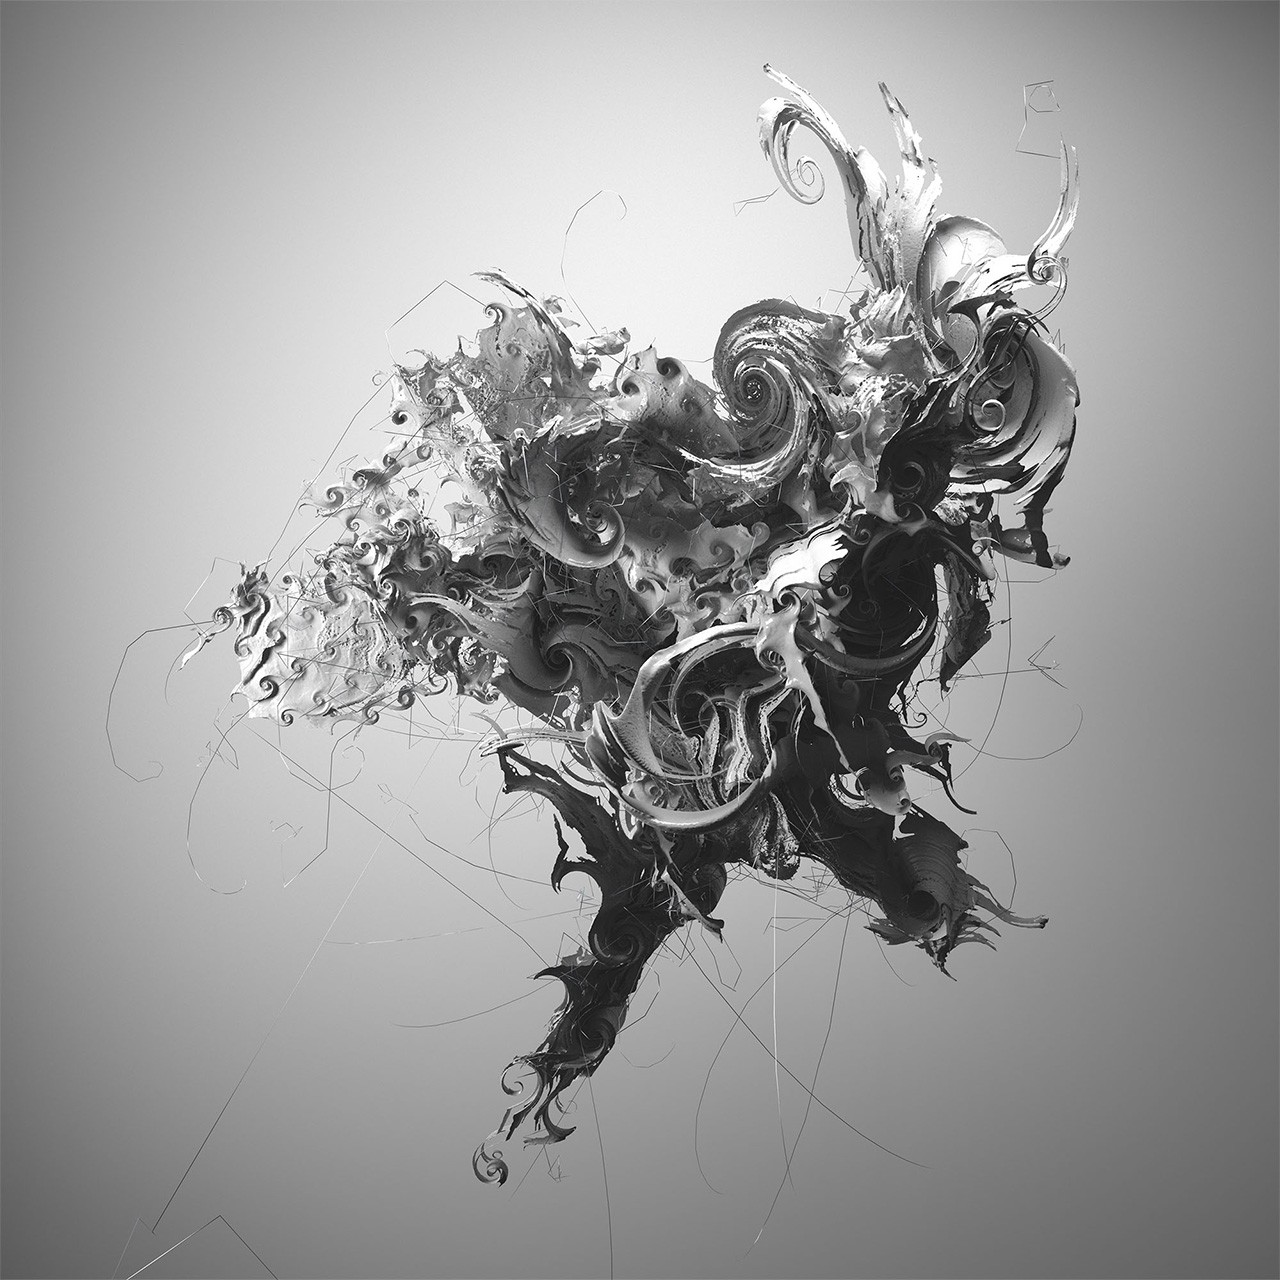
Beautiful structures oozing with organic flow as well as available 3D prints. Be sure to explore all the different gallery sites for some truly stunning work!
There’s been some silence on the home front but that’s due to several new plugins that are currently being updated / developed and will be made available soon. Needless to say, there is some awesome technology coming out soon that will be of great interest to artists, designers and photographers.
While there is no specific release date yet, please make sure to check back regularly for new updates!
I’ve just released the Image Light Leaks Vol. 2 – a massive collection of 150 4K professional image light leaks for digital artists, designers, photographers and retouchers! Check it out here!
I’ve just released the Image Light Leaks Vol. 1 – a massive collection of 200 4K professional image light leaks for digital artists, designers, photographers and retouchers! Check it out here!
I’ve just released the Image Light Leaks Free Pack – a 100% free collection of 20 4K professional image light leaks for digital artists, designers, photographers and retouchers! Check it out here!
I’m pleased to announce the immediate release and availability of Lattice, my new particle based procedural lattice generator for Adobe Photoshop and compatible hosts!

Lattice is a novel Photoshop plugin for designers, illustrators and digital artists for the creation of generative design. What are you waiting for? Go check it out now!
I’ve just come across the work of Leonardo Solaas who was commissioned to produce some stunning generative art pieces for a book called Propagaciones in Chile.
You can check out the entire collection on his Flickr page.
Additionally, you can see some of Leonardo’s other work on his website.
A stylish, fun and very well crafted short film called Romeo Reboot by Rafael Grampá.
You can see it in full, along with a making of featurette, here.
A pretty interesting and well executed short film called Traveler written and directed by Simon Brown. See it here.

It’s been quiet around here as of late and it’s because I’ve been working hard finishing one of my latest projects. Today, CGPlugins.com was officially launched!

CGPlugins.com (Computer Graphics Plugins) is a website designed for developers to promote their computer-graphics related plugins & scripts, for free, so as to draw attention, improve product visibility and increase SEO ranking through linking to their official product homepage. For users, it serves as a massive repository of the world’s greatest CG software collection, all housed under one roof.
As a software developer myself, I’ve come to realize forums do not allow software promotion or bitterly look down upon it, news sites are highly selective in what articles they carry and websites charge absurd fees to have your product featured. Banner ads require costly click-through rates while magazine ads can charge upwards of thousands of dollars for limited exposure. The truth is, there are few and limited options when it comes to showcasing our work from both a practical and financial standpoint. This is quite a contrast from all the digital-art and photography forums and websites out there that are built purely upon the principle of displaying computer graphics imagery. It’s ironic that one is considered an art and welcomed with open arms while the developmental side of it is not.
I am both an artist and a developer. From my perspective, a creative or technical piece are both just as much a work of art and should be treated accordingly.
Disappointed by this, I set out to develop a powerful, fresh and great looking website that would solve this problem. After months of feedback, testing, research and development, CGPlugins.com was born.
If you are a software developer who wants to get his software showcased and promoted, sign up now and start uploading your content! If you are a user and you’re looking for what will ultimately become one of the largest repositories of CG plugins and scripts on the web, check it out now!
Beeple is the work of Mike Winkelmann and undoubtedly one of the most original artists out there today. His work is cutting-edge CGI and a lot of it consists of VJ clips – which he even gives away for free! I’ve been following Mike’s VJ work for some time (I have many favorite links on my Vimeo) and I was delighted to see him release a 1:45 short film called Zero-Day. Zero-Day is an awesome VJ movie on the topic of cyber warfare.
Go check out Beeple today!
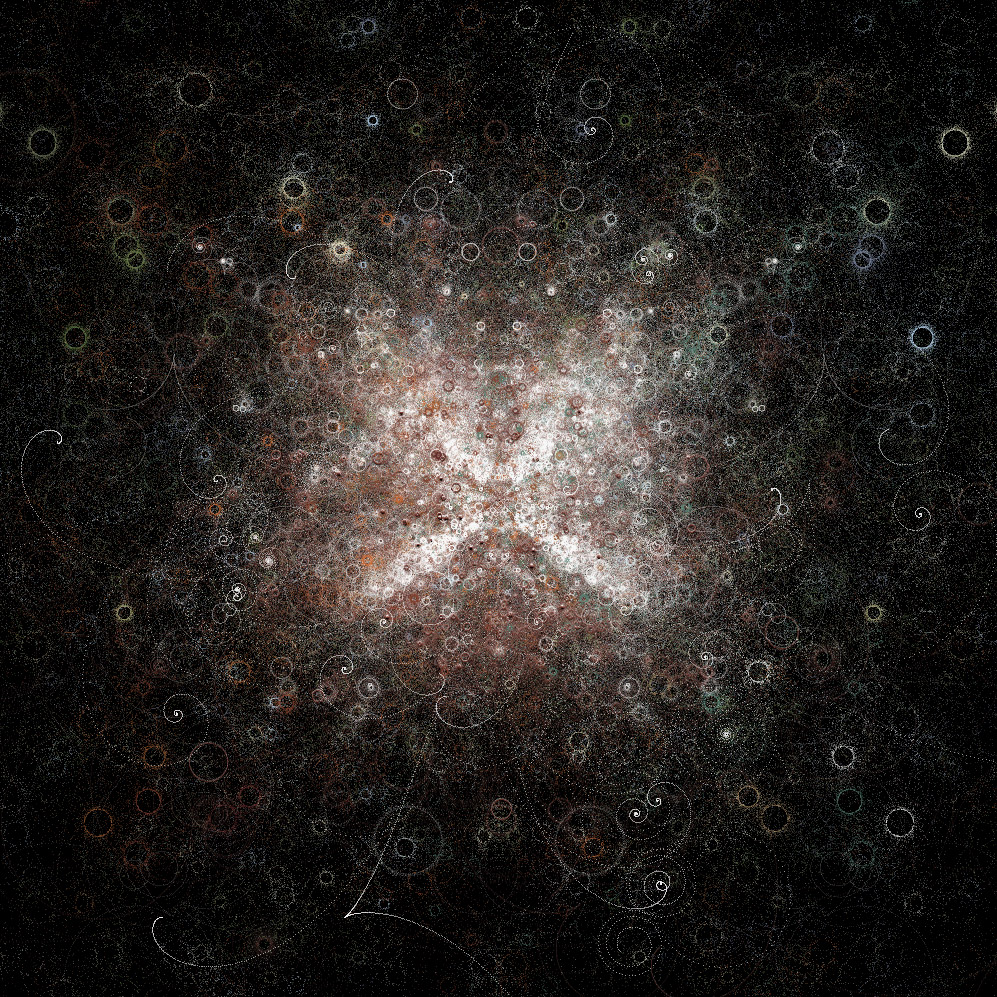
In case you’ve been living under a very large rock for the past few years, you’ve been aware of the discovery of the plotting of the famous Mandelblot fractal in three dimensions, called the Mandelbulb, developed by Daniel White and Paul Nylander.
Skytopia showcases some of these stunning 3d Mandelbulb projections and discusses the algorithmic basis behind them. While this is now rather old (2009), if you haven’t seen it before, I highly recommend you check it out.

There are a ton of absolutely gorgeous renders such as these:


My discovery of the Mandelbulb led to my own set of very detailed Mandelbulb experiments using Tom Beddard’s fantastic Mandelbulb script for Adobe’s Pixel Bender GPU engine.
I even wrote my very own *extremely primitive* Mandelbulb renderer.
Do yourself a favour and go check out Skytopia right now!
One of my favorite CG fractal artist is Tom Beddard over at his (recently revamped) website Sub.Blue. Tom has been developing some of the coolest CG generate art experiments I’ve ever seen, all custom written with various scripts, including a powerful Mandelbulb explorer complete with ambient occlusion coded using Adobe’s now-defunct Pixel Bender. A while back, he decided to develop his own WebGL GPU accelerated fractal explorer called Fractal Lab.
Tom also developed a mobile IOS fractal explorer called Frax, also utilizing the GPU accelrating methods of the iPhone.
I’ve been a long-time fan of the super-talented Jared Tarbell’s Complexification site: a gorgeous display of computer algorithms developed for generative art creation.
Jared has a jaw-dropping number of striking pieces all developed with processing.org, the open-source flexible software sketchbook and language for learning how to code within the context of the visual arts.
Among Jared’s wonderful pieces is the Box Fitting applet which is so cool it inspired me to develop my own port for Adobe Photoshop.
Jared also has some more common CG experiments such as the Peter De Jong attractor and the Buddhabrot fractal, both of which I too have developed more complex versions of: Peter De Jong attractor & Buddhabrot.
I highly encourage everyone to take a look through his incredibly-creative and unique pieces!
Another gorgeous fractal / generate art experiment created by Lee Griggs using XGen cubes rendered with Arnold. He uses a texture map to drive the length and color of an XGen primitive. While I haven’t personally used Arnold yet, it is claimed to be able to render millions of instances of geometry without any problems.
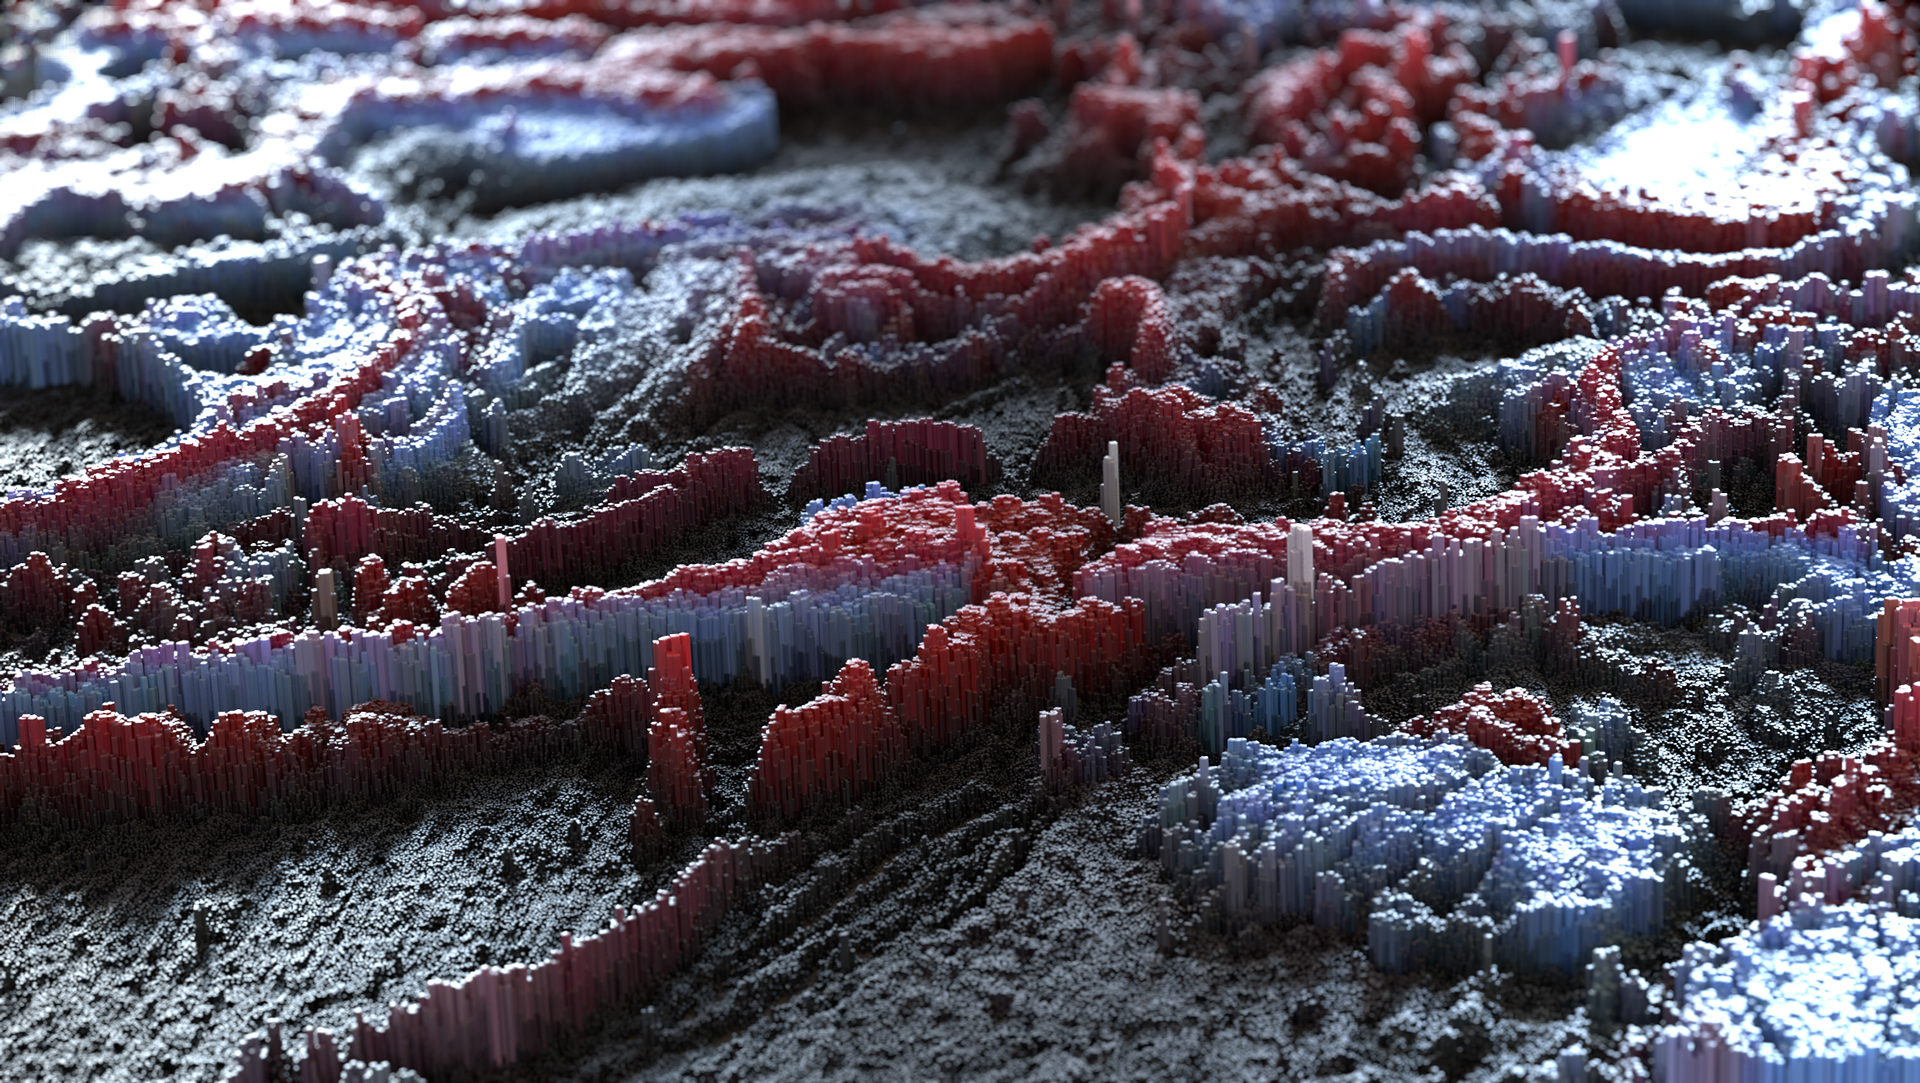
Lee has a ton of other stunning CG experiments mostly created with Arnold so be sure to take a look through the rest of his site.
Check out the experiments here.
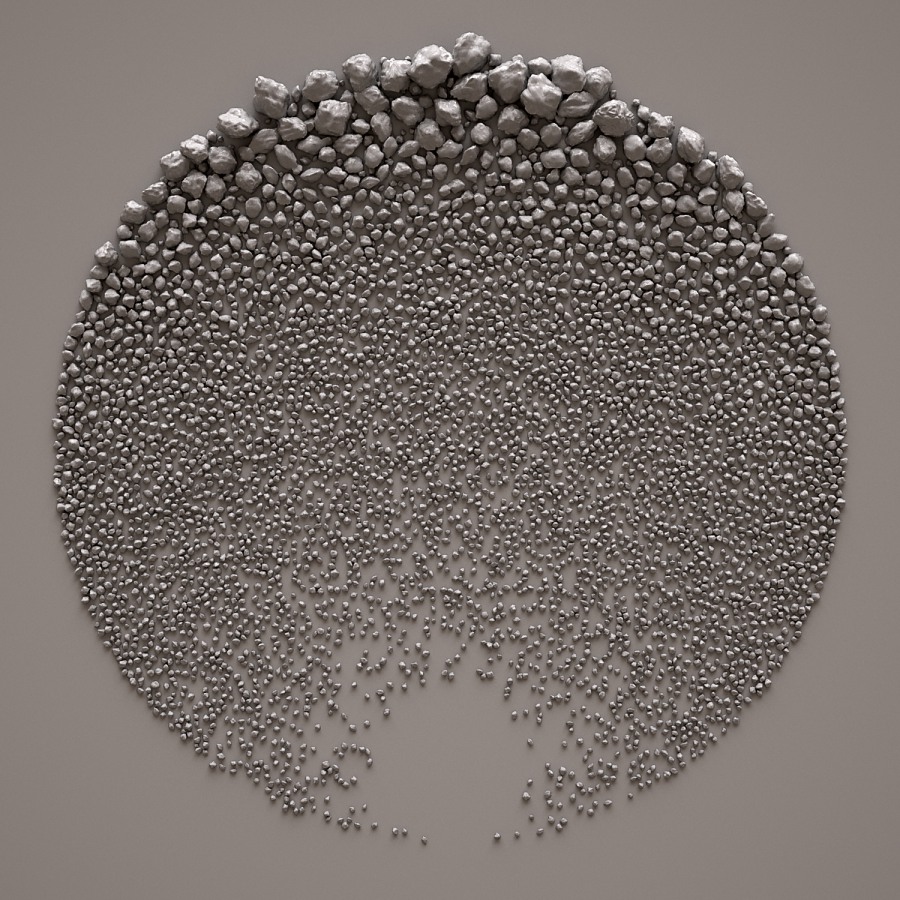
A gem of a find: Novastructura is maintained by Giuseppe Randazzo, a designer from Turin (Italy). Some absolutely stunning fractal experiments created with custom written scripts / software and then 3D printed. In particular, check out the Stone Fields section.
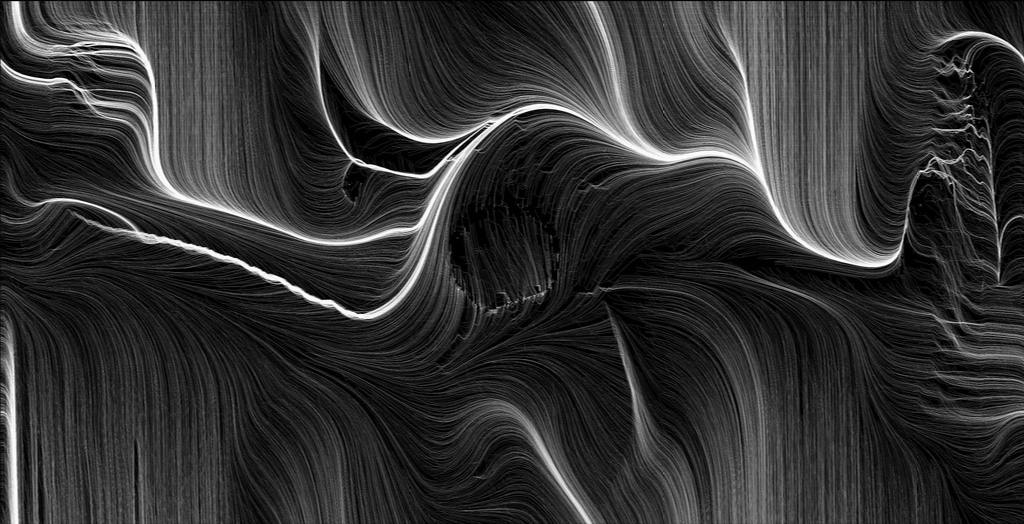
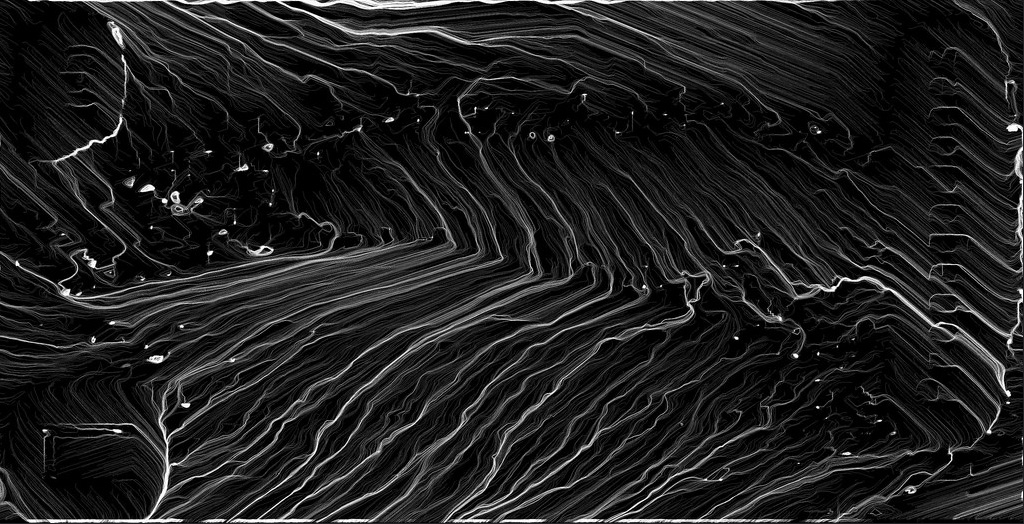
It’s no surprise I have an admiration for CFD solvers and the other day I came across this experiment which floored me – a fully GPU-accelerated computation fluid dynamics system working within a browser developed by George Corney. If you have a modern video card, this baby flies!
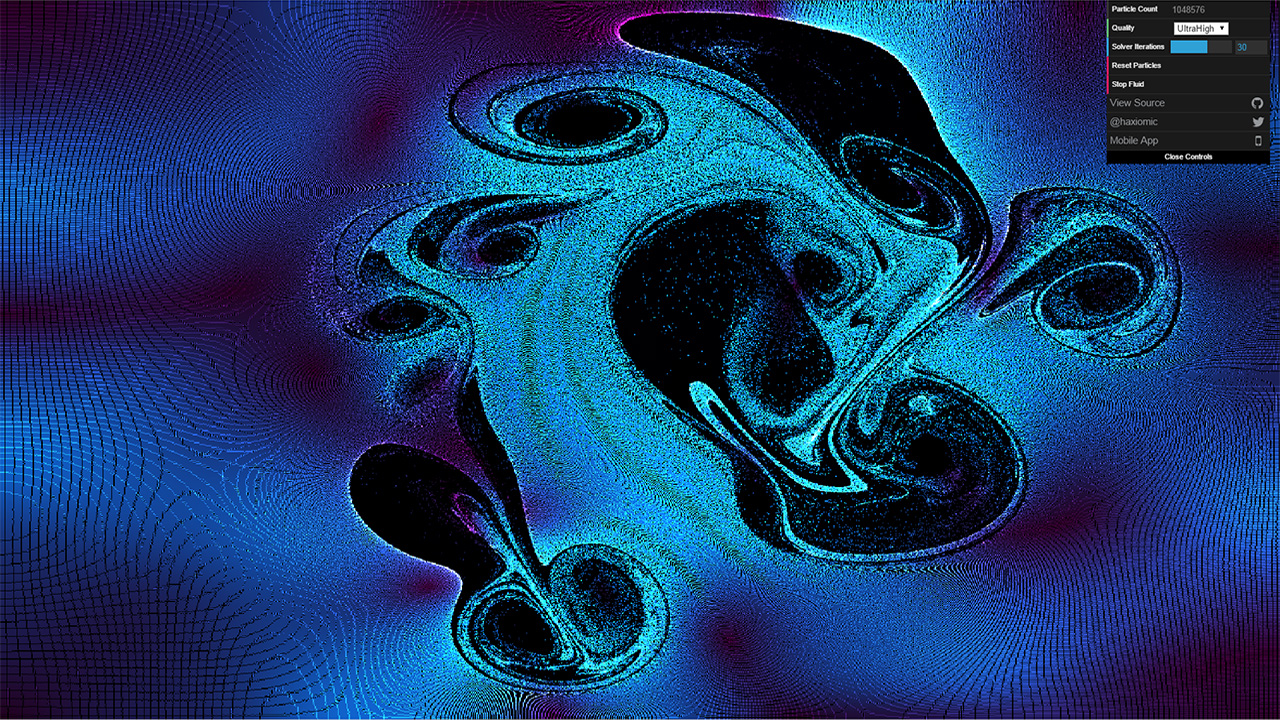
You can check it out here: GPU Fluid Experiments
I just watched the first trailer for the Gooseberry Open Movie Project created with Blender and rendered with Cycles called Cosmos Laundromat. Not only are the visuals kick-ass but the story is wonderfully captivating. Congratulations to everyone who participated for doing such a great job!

Read about more of the project here!
All freeware and commercial plugins have been updated to support Windows 10. Previously, there was a bug that produced a crash in some rare circumstances.

If you haven’t yet explored the plugins, Check them out now!
I’m pleased to announce the immediate availability of Ultraflares v1.0, the ultimate lens flare and light studio plugin for Adobe Photoshop and compatible hosts!
Backed by over a year and a half of research and development, Ultraflares boasts some of the most advanced and realistic lens flare features available today. Ultraflares comes packed with hundreds of presets including over 65 natural flares, over 60 stylized flares, over 35 glints and over 40 light leaks, all modeled after [i]real-world[/i] light phenomena.
Ultraflares is much more than a lens flare Photoshop plugin; it’s a full feature light studio. Not only does it allow the artist to produce sophisticated lens flares, but also the ability to generate a wide variety of complex camera lens effects including the generation of volumetric lights, glows, light glints, star filters, sun glows, star bursts, film burns & aberrations, light leaks, highlight accents, photo filters, bokehs, lens textures, and much, much more. It is an indispensable tool for 3D artists looking to push their 3D renders to the next level.
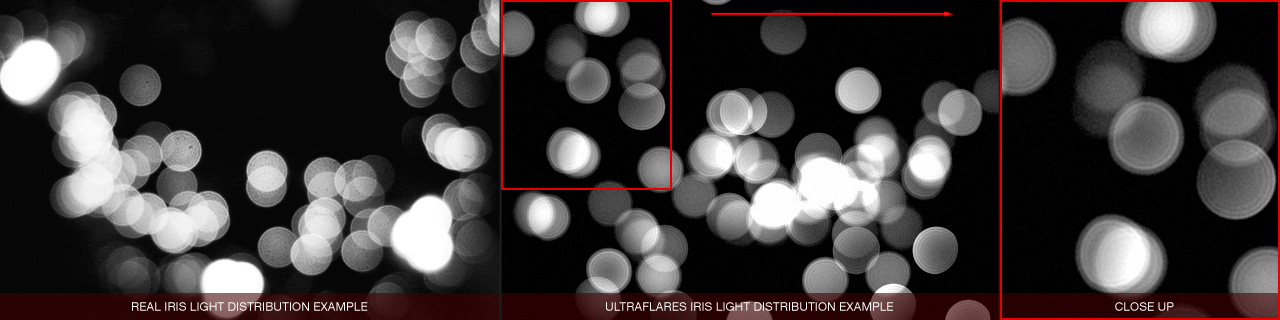
Ultraflares features stunningly-realistic iris effects such as spherical aberration, aberration scale, aberration offset and asymmetry for replicating ultra-realistic natural lens flares. Circular completion controls how much of the iris diameter (in degrees) is visible while light distribution, a new and truly unique feature specific to Ultraflares only, controls the illumination across the iris with it’s respective angle. Chromatic aberration can be globally applied to the entire flare while spectral coloring can work on any number of specific objects. Add subtle touches like iris edge ringing to push the realism to the next level.

Ultraflares brings the power of lens textures to the artist’s fingertips. Select any lens texture and watch as Ultraflares realistically illuminates the texture according to it’s lens flare color, location and structure. Choose Ultraflares’ own highly configurable procedural lens orbs object or use custom textures of any kind. Embedded custom textures in compatible file formats such as PSD allow Ultraflares to easily toggle between multiple textures.

Ultraflares is the definitive solution for any hobbyist or professional digital artist, designer or photographer demanding cutting-edge, high-quality lens flares and light effects. Check out the [url=http://richardrosenman.com/shop/ultraflares/]website[/url] for a full list of features and detailed flare galleries.
Please visit the Ultraflares official homepage for more information including a free demo at the official Ultraflares project page.
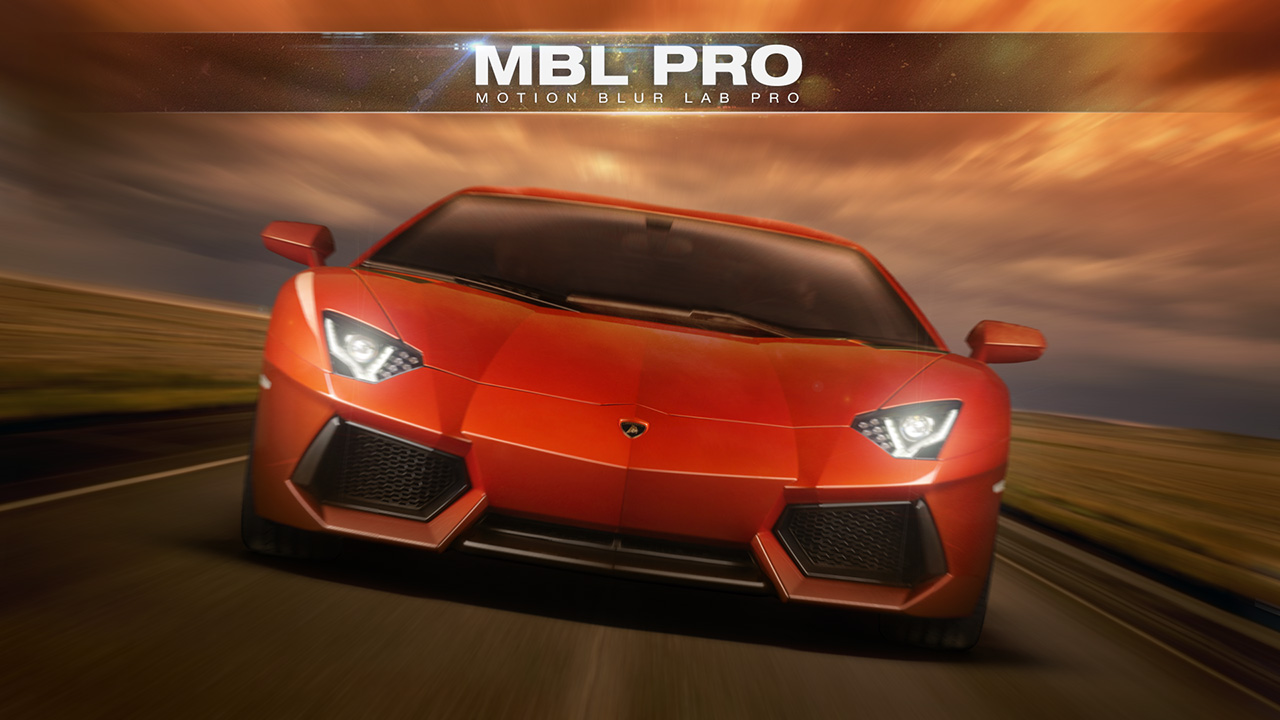
I’m pleased to announce my popular MBL PRO plugin for Adobe Photoshop or compatible hosts has been finally released as a 64 bit application.
MBL PRO (Motion Blur Lab PRO) is an Adobe Photoshop (or compatible host) plugin capable of producing high-quality, multi-directional and variable-strength motion blur effects quickly and efficiently using motion vectors.
MBL PRO features numerous modes of operation for simulating virtually any type of real-world motion blur. Single vector blurs are useful for linear motion blurs. Zoom blurs are useful for depth-driven motion blurs while spin blurs are useful for rotationally-driven motion blurs. Both offer sophisticated ellipticity and orientation options for dealing with varying perspectives. Finally, multiple vector blurs are useful for complex, multi-directional and variable-strength motion blurs. All motion blur types feature various distribution methods such as constant, increasing, decreasing and soft. Motion blur can be introduced to subjects, backgrounds or both.
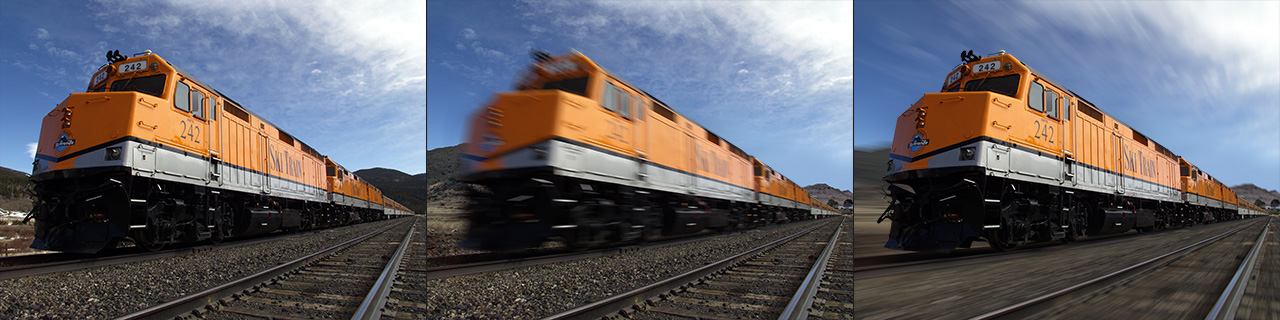
To learn more about MBL PRO, please click here.
I’m pleased to announce my popular Lumiere Photoshop plugin for Adobe Photoshop has been updated to v2.0 and, more importantly, finally released as a 64 bit application.
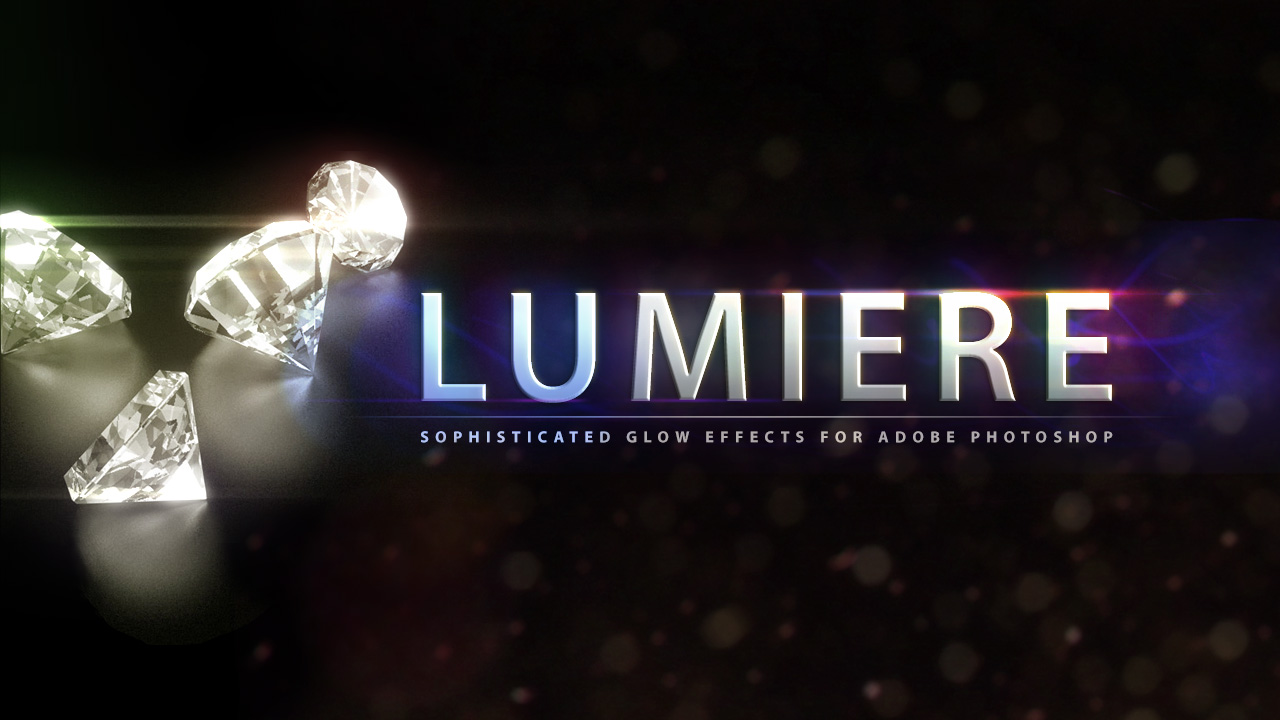
Lumiere is an extremely powerful plugin for Adobe Photoshop that generates advanced glow effects. Lumiere can produce sophisticated specular blooms, flared highlights and diffused glows with complete control over every possible variable, all at the artist’s fingertips. Lumiere works on image luminance – just like real glows do. The brighter areas of the image are processed into beautiful glows.
Lumiere offers professional-grade masking controls for isolated glows. The artist can specify a hotspot and falloff radius as well as image coordinates for advanced masking operations. Ten different luma conversion algorithms are available based on various industry standardized color spaces. Lumiere provides two highly optimized diffusion algorithms with independent axis control and multi-pass operations.
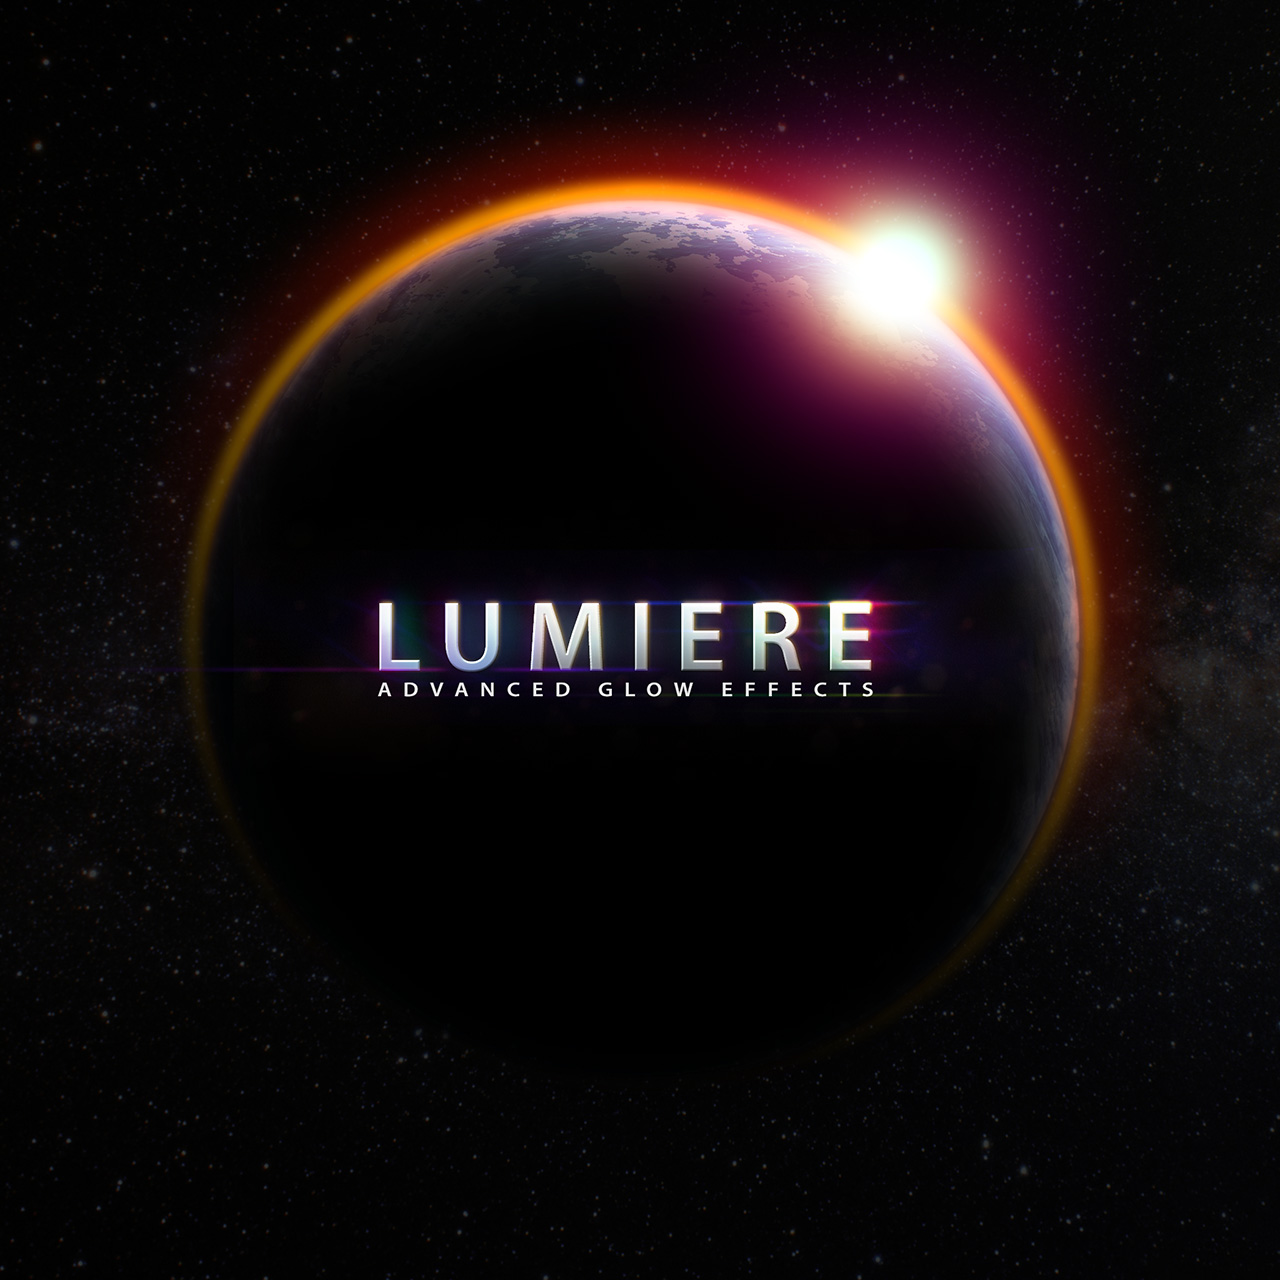
To learn more about Lumiere, please visit Lumiere’s product page.
I’m happy to announce my 3D Sphere PRO plugin for Adobe Photoshop has been updated to v2.0 and, more importantly, finally released as a 64 bit application.
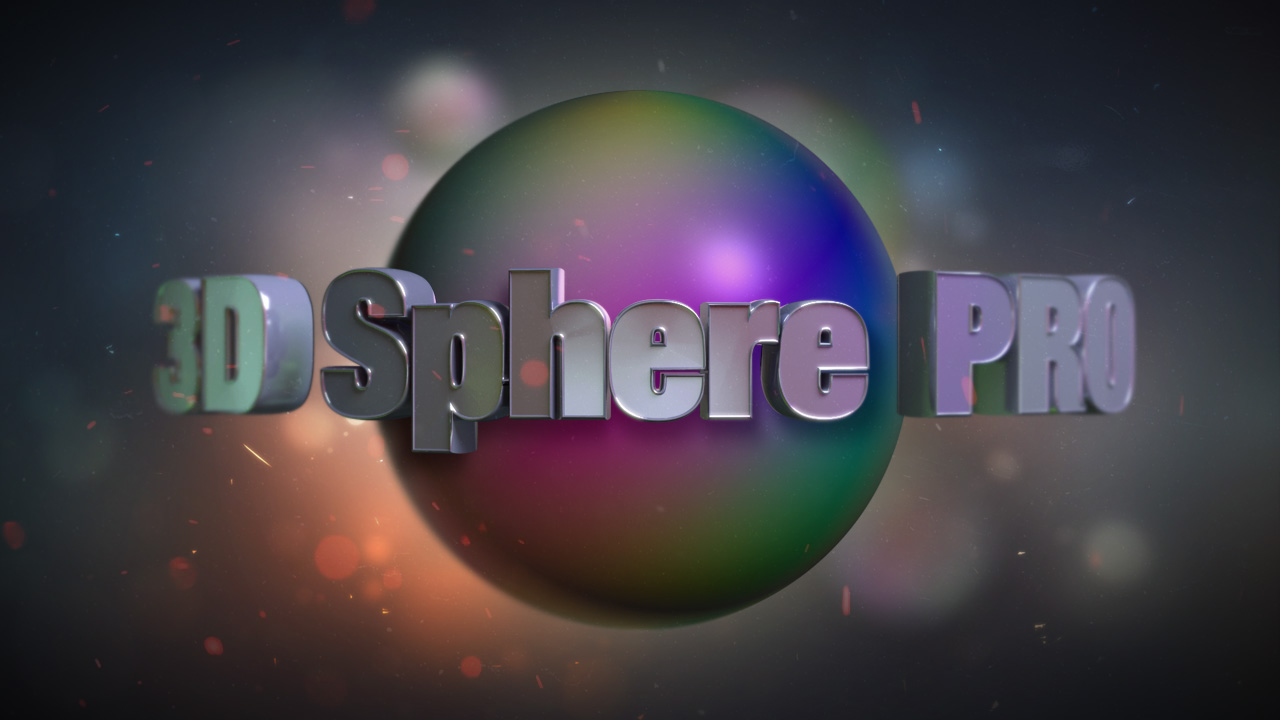
3D Sphere PRO is a versatile Photoshop plugin that generates 3D spheres.
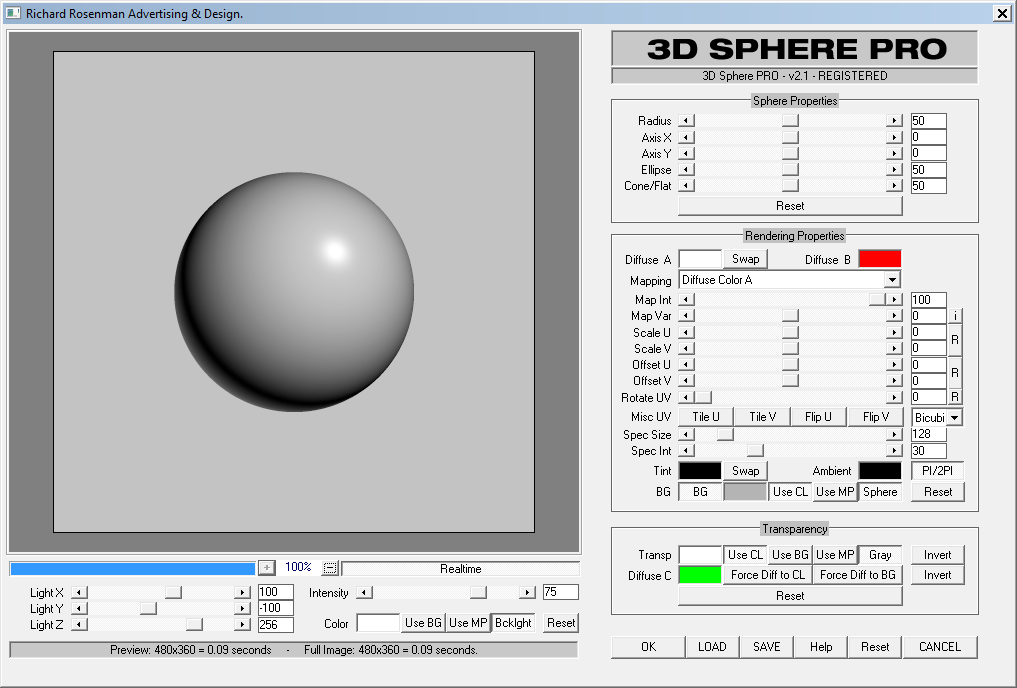
3D Sphere PRO boasts a feature-rich tool set including texture mapping, procedural mapping, light position & intensity, specular lighting, transparency and much, much more. 3D Sphere PRO provides artists with the capability to generate 3D spheres quickly and easily without any prior 3D software experience.

To learn more about 3D Sphere PRO, click here.
I’m happy to announce my very popular Lens Corrector PRO plugin for Adobe Photoshop has been updated to v1.5 and, more importantly, finally released as a 64 bit application! This the first of my many commercial plugins to be released in 64 bit.
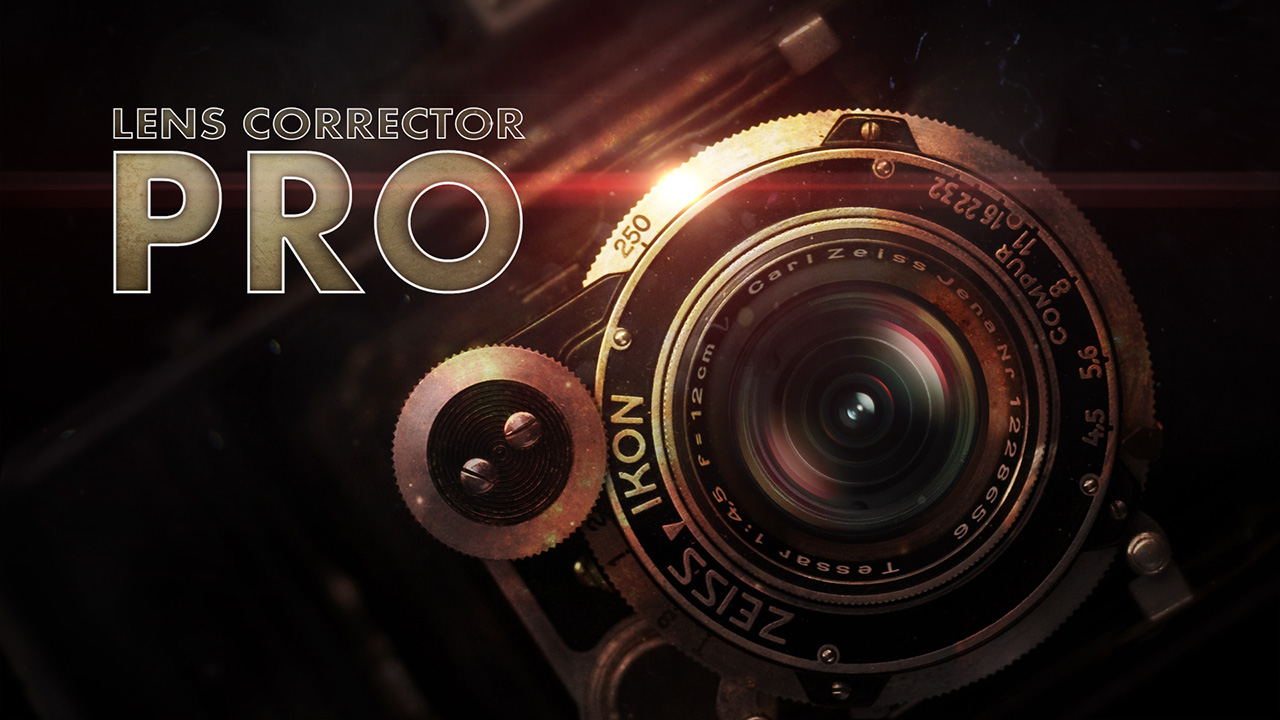
Lens Corrector PRO is a powerful Photoshop plugin capable of correcting virtually any type of conventional lens distortion. v1.5 features a completely redesigned interface with a massive preview, fulfilling many of the user feedback requests.
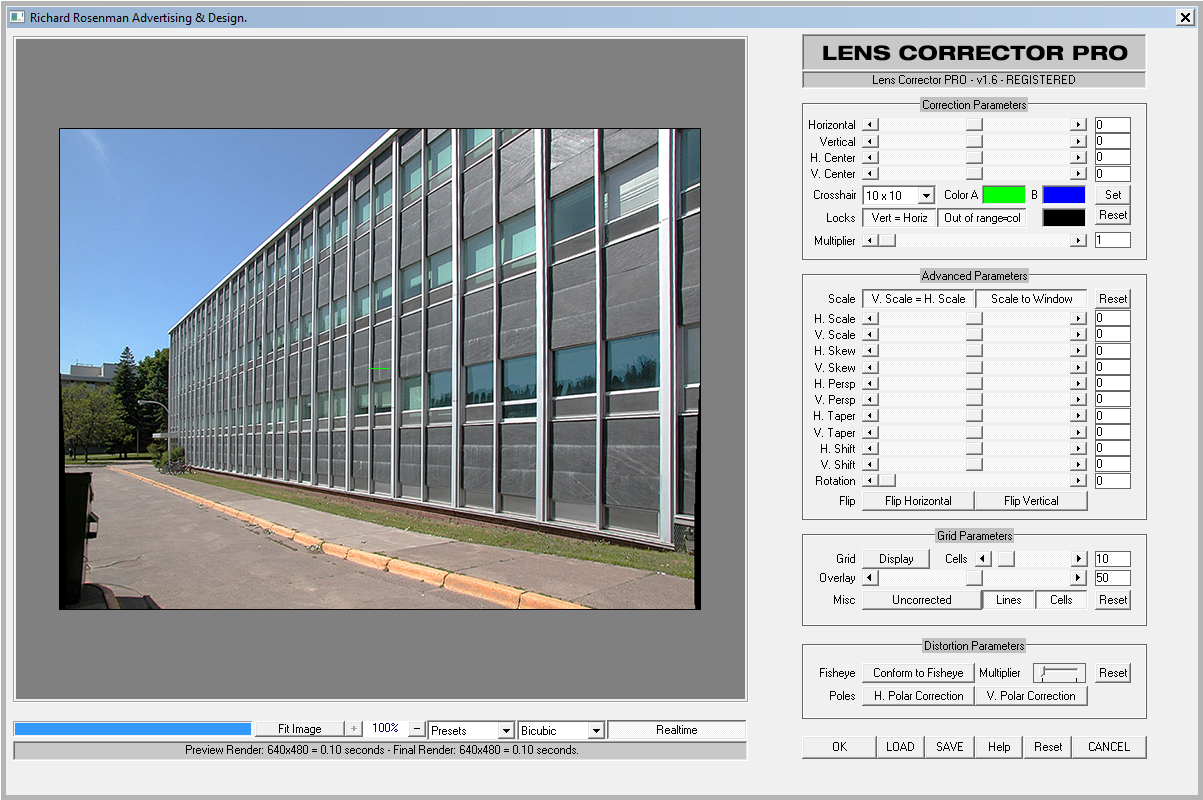
You can check out Lens Corrector PRO here.
After thousands of requests and a significant overhaul, I’m pleased to announce the immediate availability of my freeware plugins for Adobe Photoshop, compiled and fully working in 64 bit. Additionally, there are many new, never before seen plugins available. Please feel free to check them out and most importantly, remember they are all FREE!
These Photoshop plugins are used by artists around the world. If you are a 3D artist, 2D designer, graphic artist, illustrator, motion designer, matte painter, photographer, photo-retoucher, engineer, etc, these plugins are of interest to you.
Absolutely stunning film by Erik Wernquist called Wanderers, a vision of our humanity’s future expansion into the Solar System. Erik is an insanely talented digital artist and animator from Stockholm, Sweden.